Blog

  • What Does a Pond Contractor Do? Everything You Need to Know

    What Does a Pond Contractor Do? Everything You Need to Know

    pond contractor

    If you’ve ever wondered what a pond contractor does, you’re in the right place. Whether you’re considering installing a pond, need maintenance for an existing one, or are facing a problem with your pond, a pond contractor can be a big help.

    This article will explain what a pond contractor does, why you should hire one, and how to choose the right one for your project. Let’s dive into the world of pond contractors and explore their services in detail.

    Who is a Pond Contractor?

    A pond contractor is a professional who specializes in the design, construction, maintenance, and repair of ponds. They have the knowledge and experience to create beautiful and functional water features on your property. They can help with everything from building a small backyard pond to large water gardens and koi ponds.

    But being a pond contractor isn’t just about digging a hole and adding water. There’s a lot more that goes into it, including planning the layout, choosing the right materials, and making sure everything works perfectly.

    What Services Do Pond Contractors Offer?

    Pond contractors offer a variety of services, depending on what you need. These can be divided into a few main categories: construction, maintenance, repairs, and water feature installation.

    Pond Construction and Design

    When you want a new pond, the first thing a contractor will do is help you design it. This means figuring out where the pond will go, what type of pond you want (like a koi pond or a simple water garden), and what materials will be used. A good contractor knows how to design a pond that will look great and function well on your property.

    Here’s what the process usually looks like:

    • Planning: The contractor will ask questions about your vision, the space available, and how you plan to use the pond.
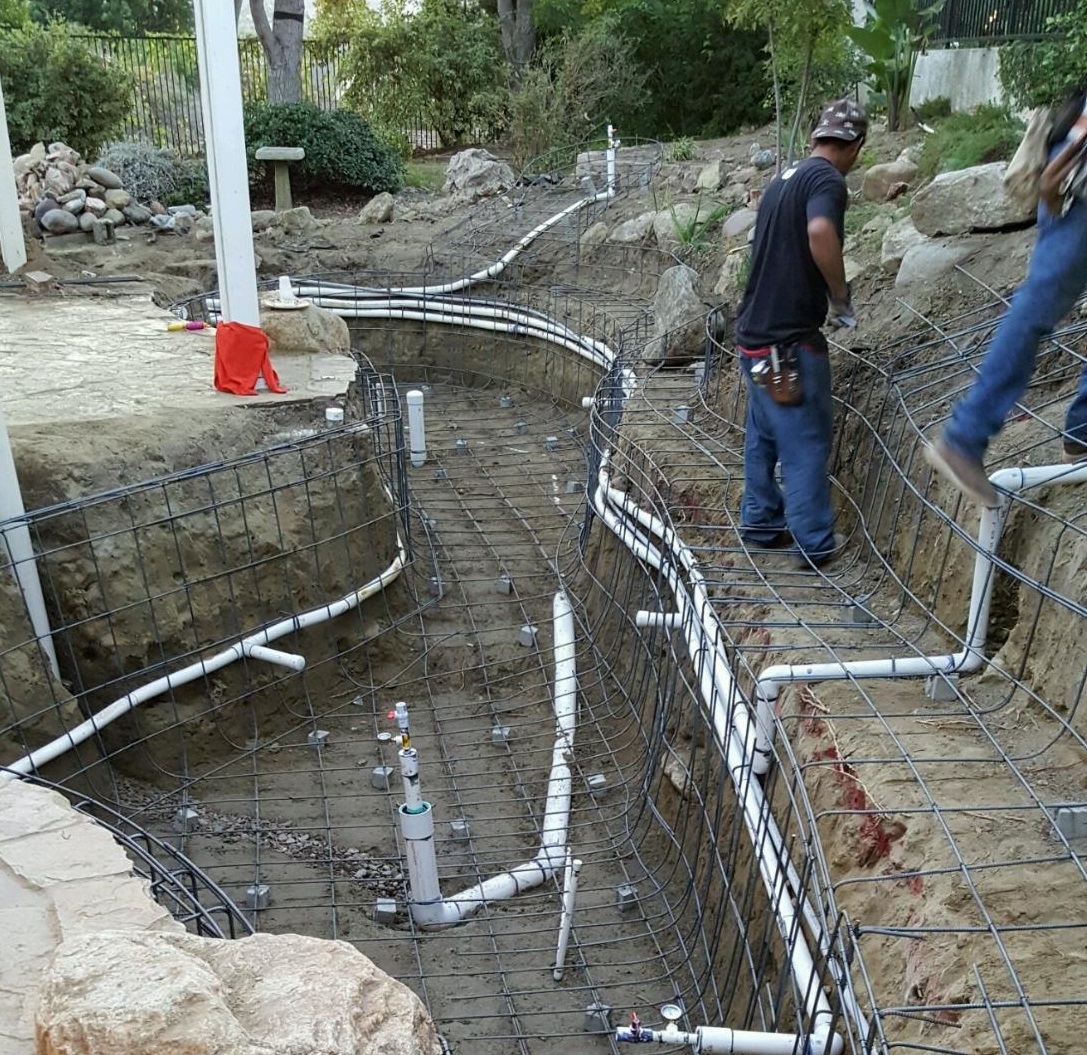
    • Excavation: They will dig the hole for the pond, ensuring the shape and size match the design.
    • Lining: The contractor will install a protective liner to keep water from leaking out.
    • Water Features: If you want fountains, waterfalls, or streams, they will add these features to improve the look and sound of your pond.
    • Adding Plants and Fish: Finally, the contractor will help you choose and place aquatic plants and fish, completing the pond ecosystem.

    Pond Maintenance Services

    Once your pond is built, it needs regular care to keep it healthy. Pond contractors can offer maintenance services to help you keep the water clean, the plants healthy, and the fish happy.

    Common maintenance tasks include:

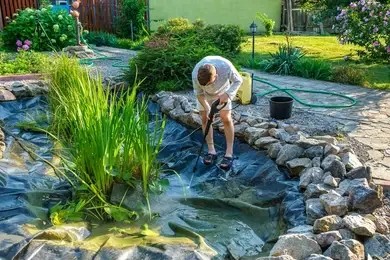
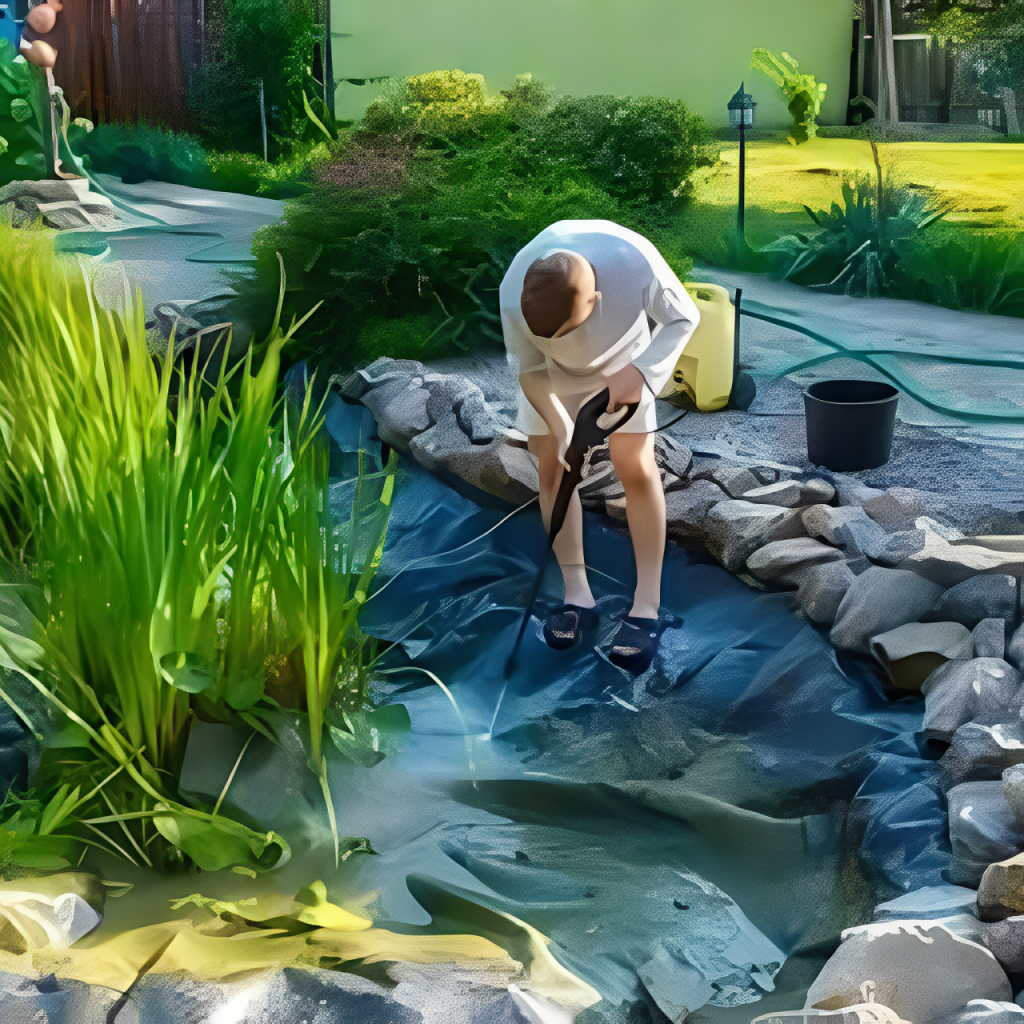
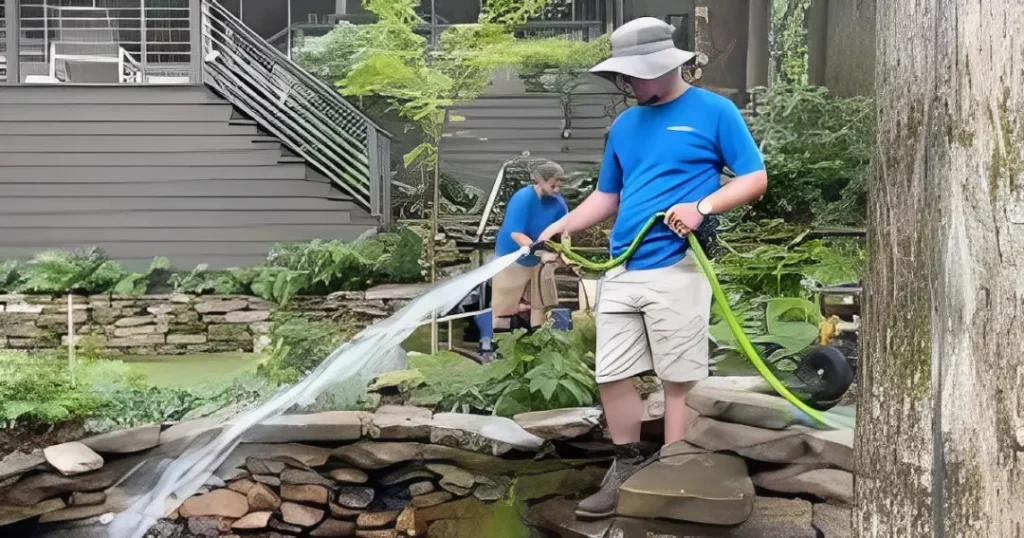
    • Cleaning: Over time, leaves, dirt, and algae build up in the pond. A contractor will clean the pond, remove debris, and ensure the water stays clear.
    • Algae Control: Algae growth can be a big problem for ponds. A pond contractor knows how to manage and prevent algae.
    • Checking Water Levels and Pumps: Contractors will check the water level to make sure it’s just right. They also inspect pumps and filters to make sure everything is working.
    • Seasonal Care: In colder climates, your pond needs extra care in winter. A contractor can help winterize your pond, protect the fish, and make sure everything is ready for spring.

    Pond Repairs

    Ponds, like anything else, can develop problems. Whether it’s a leak in the liner or a pump that’s not working, pond contractors are skilled at identifying and fixing issues. Here are some common repairs they handle:

    • Fixing Leaks: Over time, pond liners can tear, causing water to leak. A contractor can find and repair the leak, saving your pond from drying out.
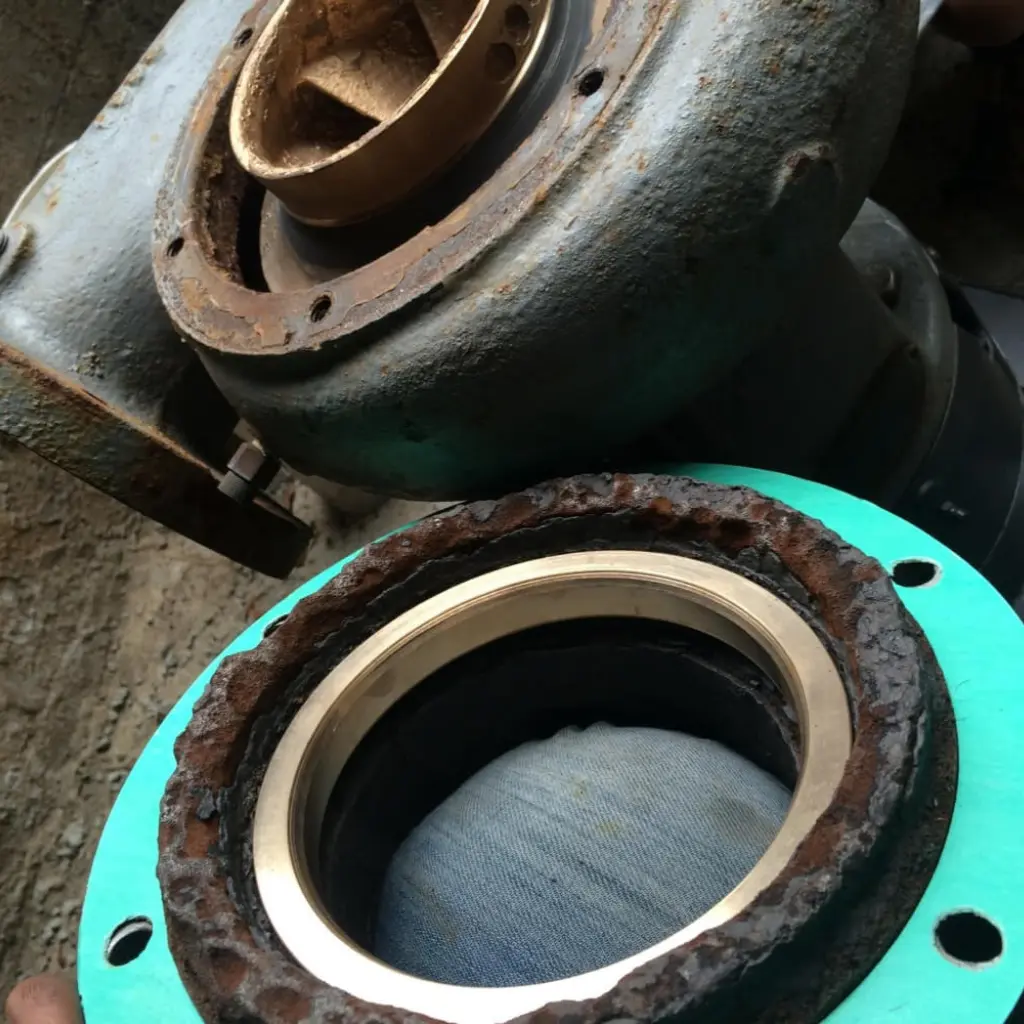
    • Pump and Filter Replacement: If your pump or filter is broken, the contractor can replace it and ensure your pond stays clean.
    • Fixing Water Features: Fountains or waterfalls can break or get clogged. A pond contractor will fix or replace these features.

    Water Features Installation

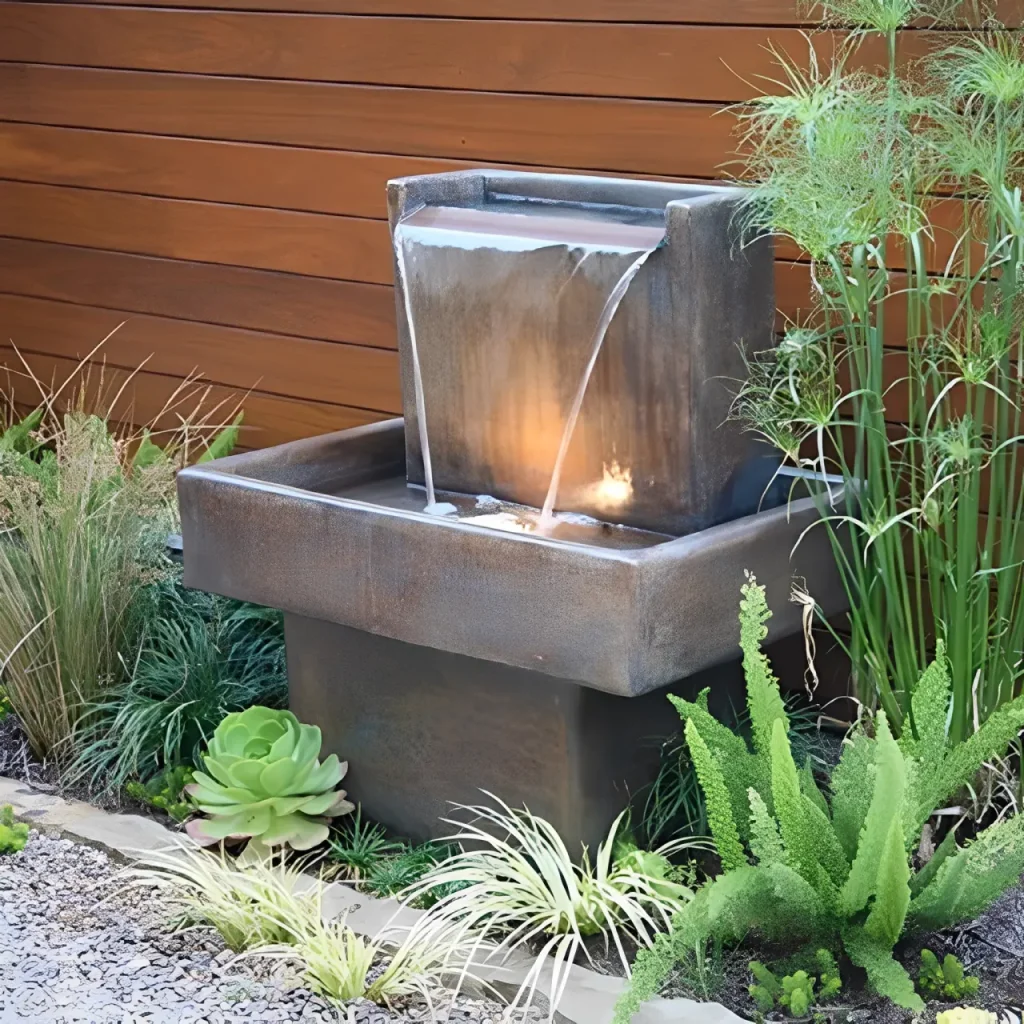
    Water features like fountains, waterfalls, and streams are a great way to add beauty and sound to your pond. Pond contractors can design and install these features, creating a peaceful and relaxing atmosphere. They can also help you choose the right type of water feature based on your pond’s design and size.

    Why Should You Hire a Professional Pond Contractor?

    Hiring a professional pond contractor offers many benefits. Here are some reasons why you should consider getting help from an expert:

    Expertise

    A pond contractor has the knowledge and skills to design and build a pond that works well. They understand water flow, ecosystem balance, and how to create a pond that’s both beautiful and functional. They also know how to avoid common mistakes that DIYers might make.

    Save Time and Effort

    Building or maintaining a pond can be time-consuming. A pond contractor will handle all the hard work for you, from excavation and installation to cleaning and maintenance. This saves you time and allows you to enjoy your pond without all the stress.

    Cost-Effective in the Long Run

    While hiring a pond contractor may seem like an upfront expense, it can save you money in the long run. Professional contractors can prevent costly mistakes, fix problems quickly, and ensure your pond lasts longer. Plus, they can help you choose the best materials that fit your budget.

    Pond Longevity

    With regular maintenance and care from a professional, your pond will last longer. Pond contractors know how to keep everything running smoothly, so you won’t have to worry about repairs or breakdowns.

    How to Choose the Right Pond Contractor?

    Not all pond contractors are the same. When selecting one, it’s important to do your research to make sure you hire someone qualified and reliable. Here are some tips to help you choose the right contractor:

    Research and Read Reviews

    Before hiring a contractor, check online reviews and ask for recommendations from friends or family. Look for someone who has experience working on ponds similar to yours, whether it’s a koi pond, a decorative water garden, or something else.

    Ask About Their Experience

    A good pond contractor will have years of experience and a portfolio of past projects. Ask to see examples of their work and check if they have any certifications or licenses that prove they are qualified.

    Get Multiple Quotes

    It’s always a good idea to get quotes from several contractors before making a decision. Compare prices, services, and what each quote includes. Keep in mind that the cheapest option may not always be the best.

    Check for Insurance and Warranty

    Make sure the contractor has insurance in case of accidents or damage to your property. You should also ask about warranties on their work and materials, especially for pond construction and repair.

    What Are the Benefits of Having a Pond on Your Property?

    You might be wondering why you should even bother installing a pond in the first place. Here are some benefits to having a pond on your property:

    Aesthetic Appeal

    A pond adds beauty to your yard. The sight and sound of water can transform your space into a peaceful retreat. Whether you want a simple fish pond or a larger water garden with plants and waterfalls, a pond can make your garden look stunning.

    Wildlife Habitat

    Ponds provide a habitat for various wildlife, including fish, frogs, and birds. If you enjoy nature, having a pond can attract local wildlife and add to the biodiversity of your yard.

    Stress Relief

    The sound of flowing water has been shown to help reduce stress and promote relaxation. Just sitting near a pond can help you feel calm and peaceful. It’s a great place to unwind after a long day.

    Increase Property Value

    A well-designed pond can increase the value of your home. Potential buyers may be more interested in a property that has a beautiful and well-maintained pond, especially if it’s part of an overall landscape design.

    DIY vs. Hiring a Pond Contractor – What’s Best for You?

    If you’re handy and enjoy DIY projects, you might consider building or maintaining your pond yourself. However, there are some challenges you’ll face. Here’s a comparison:

    DIY Pond Construction and Maintenance:

    • Pros: You have full control over the project and can save money on labor costs.
    • Cons: It can be time-consuming, and without the right skills, you might make costly mistakes. Pond construction and maintenance require knowledge of water chemistry, pump systems, and fish care.

    Hiring a Pond Contractor:

    • Pros: A contractor has the experience to get the job done right the first time. They also offer professional maintenance services and can fix problems quickly.
    • Cons: You’ll need to pay for their services, but the value of their expertise is often worth it.

    Cost of Hiring a Pond Contractor

    The cost of hiring a pond contractor varies depending on factors like the type of pond, its size, and the services required. Here’s an idea of what you might expect to pay:

    • Pond Construction: Small ponds may cost $2,000–$5,000, while larger ponds can cost $10,000 or more.
    • Maintenance: Regular maintenance might cost $100–$300 per visit, depending on the size and complexity of the pond.
    • Repairs: Pond repairs can range from $200–$1,000, depending on the issue.

    Conclusion – Why a Pond Contractor is Essential for Your Pond Project

    A pond contractor plays a crucial role in ensuring your pond is built well, stays healthy, and lasts for years to come. They have the expertise to design, construct, and maintain your pond, helping you avoid mistakes and save time. If you want a beautiful, functional pond, hiring a professional contractor is a smart choice. So, whether you’re planning to build a new pond or need help maintaining an existing one, a pond contractor can help you every step of the way.

    If you’re in Southern California and ready to build your dream pond or need expert maintenance for your existing one, visit KoiPros.com to get started today. Koi Pros serves with professional pond design, construction, and maintenance services to keep your pond looking its best all year long.

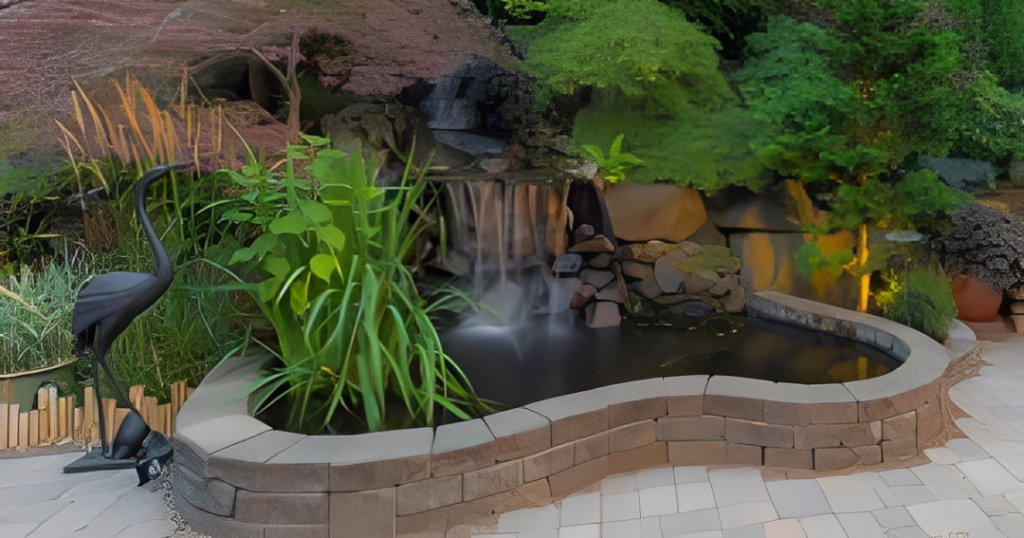
  • Water Garden Contractor & Pond Landscaping Ideas

    Water Garden Contractor & Pond Landscaping Ideas

    Water Garden

    Adding a water garden or pond to your backyard can change the way your space feels. Water moves, reflects, and attracts life. It can create calm and bring nature closer to your home. From koi ponds to small water features, there are many ways to create a water garden that fits your style.

    This guide covers everything homeowners need to know. We will talk about planning, design ideas, installation, costs, maintenance, and when to hire a water garden contractor. You will also see ideas for landscaping your pond to make it a focal point of your yard.

    Understanding Water Gardens

    What Is a Water Garden

    A water garden is a pond or water feature with plants, sometimes fish, and a system to keep it clean. Unlike a regular pond, a water garden is designed to look natural while keeping the water healthy. Water gardens can be decorative or functional, depending on your goals.

    Why Homeowners Choose Water Gardens

    Water gardens bring calm and beauty to a backyard. The sound of water is relaxing. Watching fish swim can reduce stress. Water gardens also attract birds, frogs, and insects, which add life to your yard.

    Water features can also increase property value. A well-maintained pond makes your home stand out and can be a selling point in the future.

    Types of Water Gardens

    Water gardens come in different forms. You can have a koi pond, a reflection pond, or a small decorative pond. Some include waterfalls or streams, while others focus on plants and rocks. You can choose natural designs that blend with your garden or modern designs with clean lines.

    Planning Your Water Garden Project

    Setting Goals

    Before building a pond, decide what you want from it. Do you want a peaceful place to relax, a pond for koi, or a garden for plants and wildlife? Your goal affects the design, size, and maintenance of your pond.

    Choosing the Right Location

    Location is very important. The pond should get some sunlight but not too much. Too much sun can cause algae to grow quickly. Avoid placing your pond under trees. Leaves can fall into the water and make cleaning harder. Make sure the ground is level and drains well to prevent flooding.

    Size and Depth Considerations

    Pond size depends on your space and what you want to keep in it. Small ponds work well in patios or small yards. Larger ponds are better for fish or waterfalls. Depth is also important. Two to three feet is good for most water gardens. Deeper ponds help protect fish and plants and keep water temperature stable.

    Local Regulations and Permits

    Check local rules before starting. Some cities require permits for digging or installing pumps. Your water garden contractor can help you with permits and safety rules.

    Designing Your Water Garden

    Key Design Elements

    Water gardens need a few main components. A liner holds the water. A pump moves water through the filters. A filtration system keeps the water clean. Rocks and plants make the pond look natural. Lighting can make your pond attractive at night.

    Pond Shapes and Layout

    Ponds can have natural curves, straight edges, or tiered designs. Natural shapes blend with plants and rocks. Formal shapes are modern and geometric. Your pond layout affects how water moves and how easy it is to maintain.

    Choosing Plants

    Plants are important for water health. Floating plants like lilies provide shade and reduce algae. Marginal plants like cattails grow at the pond’s edge. Submerged plants like anacharis help oxygenate water. Plants also give fish places to hide and create a natural look.

    Adding Fish and Wildlife

    Koi, goldfish, and other small fish can live in your water garden. Frogs, birds, and insects may visit naturally. Fish and plants work together to keep water clean. A pond with the right balance of plants and fish is easier to maintain.

    Creative Pond Landscaping Ideas

    Natural Pond Landscaping

    Natural Pond

    Use rocks, gravel, and native plants to create a natural look. Arrange rocks along edges to hide the liner. Native plants help support local wildlife and reduce maintenance.

    Formal and Modern Pond Landscaping

    commercial pond

    For a modern look, use clean lines and minimal plants. Stone or concrete edging gives a neat appearance. Adding a small fountain or LED lights can make the pond stand out.

    Small Space Water Gardens

    Small Space Water Gardens

    Even small yards can have ponds. Use a preformed liner or container pond. Add a few plants and small fish. Mini waterfalls or wall-mounted water features work well for tight spaces.

    Waterfalls, Streams, and Fountains

    Waterfalls, Streams, and Fountains

    Moving water adds sound and oxygen. Waterfalls can be small or large, depending on the pond size. Streams can connect different pond areas. Fountains create motion and reduce algae.

    Working with a Water Garden Contractor

    What a Water Garden Contractor Does

    A water garden contractor handles the design and installation. They make sure the pond is waterproof and that pumps and filters work correctly. Contractors know how to build ponds that last.

    When to Hire a Professional

    Hire a contractor if your pond is large, has complex plumbing, or includes waterfalls. Professionals save time and reduce mistakes. Small ponds can sometimes be done as a DIY project, but a contractor ensures quality.

    Choosing the Right Contractor

    Look for experience and reviews. Ask to see photos of past projects. Check for licenses and insurance. Contractors should explain each step clearly and answer questions.

    Questions to Ask Before Hiring

    Ask about materials, timeframes, and warranties. Find out if they offer maintenance or repair services. Clear communication helps avoid surprises.

    Water Garden Installation Process

    Site Preparation

    Mark the pond area and remove rocks and roots. Dig to the planned depth and shape. Make sure the bottom is level.

    Installing Liner and Filtration

    Place the liner carefully to avoid holes. Install plumbing and filtration systems before filling the pond. Proper installation prevents leaks.

    Landscaping Around the Pond

    Add rocks, gravel, and plants. Edge the pond with stones or soil. Arrange plants to look natural and support the ecosystem.

    Filling and Balancing Water

    Fill the pond slowly. Treat the water to remove chlorine. Check pH and temperature. The pond must be balanced before adding plants or fish.

    Finishing Touches

    Add lighting, seating, or garden pathways. These elements make the pond inviting and enjoyable.

    Water Garden Costs

    Average Cost

    Small garden ponds can cost $2,000–$5,000. Large ponds with pumps, waterfalls, and custom landscaping can cost $8,000–$15,000 or more.

    Factors Affecting Cost

    Size, depth, materials, and extra features like waterfalls affect price. Labor and location also influence the cost.

    DIY vs Professional Installation

    DIY ponds can save money but may lead to problems with leaks, pumps, or water quality. A water garden contractor ensures proper design, installation, and long-term maintenance.

    Maintenance and Upkeep

    Routine Tasks

    Remove debris, clean filters, and check pumps regularly. Top up water as it evaporates. These small tasks keep the pond healthy.

    Water Quality

    Test pH, ammonia, and nitrate regularly. Use natural treatments or beneficial bacteria to maintain balance. Green or cloudy water usually means the pond needs cleaning or more aeration.

    Seasonal Care

    Spring: clean filters, check equipment, and prepare plants. Summer: control algae and provide oxygen. Autumn: remove fallen leaves. Winter: prevent freezing with a de-icer or aerator.

    Common Problems

    Leaks, algae blooms, and weak water circulation are common. Check liners, pumps, and filters. Regular care prevents most issues.

    Eco-Friendly Pond Landscaping

    Native Plants

    Native plants use less water and support wildlife. They also help maintain a natural pond ecosystem.

    Rainwater Harvesting

    Collect rainwater to refill the pond. This saves water and reduces chemical exposure from tap water.

    Solar Pumps and Lighting

    Solar-powered pumps and lights reduce energy use. They also make the pond more sustainable.

    Wildlife-Friendly Ponds

    Create safe spaces for birds, frogs, and insects. Avoid pesticides near your pond.

    Inspiring Pond Landscaping Ideas

    Japanese Water Gardens

    Use stones, bamboo, and small bridges. These ponds are calm and balanced.

    Modern Minimalist Ponds

    Use clean lines, shallow pools, and few plants. LED lights add beauty at night.

    Rustic Backyard Ponds

    Use gravel, wood, and natural edges. Create a countryside look in your yard.

    Water Gardens with Lighting

    Add underwater lamps or solar lights for evening enjoyment. Motion-activated lights increase safety.

    Conclusion

    A water garden can change your backyard into a peaceful space. It adds life, beauty, and relaxation. With proper planning, design, and maintenance, a pond can last for years.

    Hiring a water garden contractor ensures your pond is installed correctly. They handle plumbing, filtration, and landscaping. Whether you want a koi pond, small decorative pond, or a full water garden, professional guidance makes a big difference.

    Call to Action

    Ready to bring your dream backyard water garden to life? Contact Koi Pros at (714) 613-0123 today to schedule a consultation and start designing your perfect pond.

    Frequently Asked Questions

    Do I need a permit for a water garden?

    Small ponds usually do not require permits. Large ponds or ponds with electrical systems may need them. Check local rules.

    How long does installation take?

    Small ponds can take a few days. Large ponds may take one to three weeks.

    Can I add fish and plants together?

    Yes, but balance them to maintain water quality.

    How deep should my pond be?

    Two to three feet is ideal for most ponds. Deeper ponds protect fish and plants.

    Do water gardens attract mosquitoes?

    No, if water circulates and filters are working.

    How often should I clean my pond?

    Weekly cleaning for debris, filters, and pumps. Deep cleaning every few months.

  • Koi Pond Installation: What Every Homeowner Should Know

    Koi Pond Installation: What Every Homeowner Should Know

    koi pond construction
    koi pond construction

    If you’ve ever wanted to turn your backyard into a calm, relaxing space, a koi pond is a great way to do it. Koi ponds add beauty, life, and movement to your outdoor area. But before you start digging, there’s a lot every homeowner should know about koi pond installation. From planning and design to costs and care, this guide will walk you through each step in plain language.

    Understanding Koi Pond Installation

    What Is a Koi Pond

    A koi pond is more than just a water feature. It’s a living system built to keep koi fish healthy and active. Unlike a simple garden pond, a koi pond needs a strong filtration system, enough depth, and proper aeration. These parts keep the water clean and safe for the fish. The goal is to create a space where koi can swim freely, grow well, and live for years.

    Why Homeowners Love Koi Ponds

    Many homeowners add koi ponds for peace and relaxation. Watching koi swim slowly in clear water can calm your mind after a long day. The gentle sound of water also makes your backyard feel more natural. Besides the look and feel, koi are known symbols of strength, luck, and harmony in many cultures. This makes a koi pond both a visual and emotional upgrade to your home.

    Key Elements of a Koi Pond Installation

    A good koi pond includes a few main parts — a liner to hold the water, a pump and filtration system to keep it clean, and aeration to provide oxygen. Rocks, plants, and lighting make it look natural and pleasant. Every part has a purpose. For example, filters handle fish waste, while aerators prevent low oxygen that can harm koi. Skipping any of these parts can cause water problems later.

    Planning Your Koi Pond Project

    Deciding the Purpose and Style of Your Koi Pond

    Before building, it’s important to decide what kind of pond you want. Some people want a pond just for decoration, while others plan to raise koi for years. If your main goal is beauty, focus on design and landscaping. If you want to grow healthy koi, focus more on water quality and pond depth. You can also choose between natural ponds with curves and rocks or formal ones with straight edges and clean lines.

    Choosing the Right Location for Installation

    The location of your koi pond affects everything — water quality, algae growth, and maintenance. Pick a spot that gets about four to six hours of sunlight daily. Too much sun can cause algae to grow fast. Avoid placing the pond under trees because falling leaves can clog filters. Make sure the ground is not too low or uneven, so rainwater doesn’t flood the pond.

    Determining Pond Size and Depth

    Koi need space to swim and grow. A pond that’s at least three feet deep is ideal. Deeper ponds help control water temperature and protect koi from predators. The number of koi you plan to keep also matters. Overcrowding causes stress and poor water quality. It’s better to start with a few fish and add more later.

    Understanding Local Regulations and Permits

    Before starting the project, check with your city or local authorities. Some places need permits for digging, electrical connections, or running water pumps. A licensed koi pond contractor can guide you through local rules and safety standards.

    Koi Pond Design and Construction Basics

    Koi Pond Design Options

    There are many ways to design a koi pond. You can go for a natural look with rocks and plants or a modern pond with clean edges and smooth surfaces. Materials also vary. Some ponds use rubber liners for flexibility, while others are built from concrete for durability. Your space, budget, and pond maintenance preference will guide your design.

    Selecting the Right Liner

    The liner is what keeps the water inside the pond. The most common liner types are EPDM rubber, PVC, and concrete. EPDM rubber is flexible and lasts long. PVC is cheaper but less durable. Concrete is strong but costs more and takes longer to install. Make sure the liner is installed properly so it doesn’t leak later.

    Filtration and Aeration Systems

    Clean water is the most important part of a koi pond. A filtration system removes waste and keeps the water clear. Biological filters help grow good bacteria that break down toxins. Mechanical filters trap debris and dirt. Aeration systems, such as air pumps or waterfalls, add oxygen to the water. This keeps koi active and prevents algae growth.

    Water Circulation and Pumps

    Water pumps move water through the filters and back into the pond. Proper water movement keeps the pond healthy. A pump that’s too weak won’t circulate water properly. A pump that’s too strong may stress the koi. Choose one that matches your pond’s size and depth.

    Adding Waterfalls and Fountains

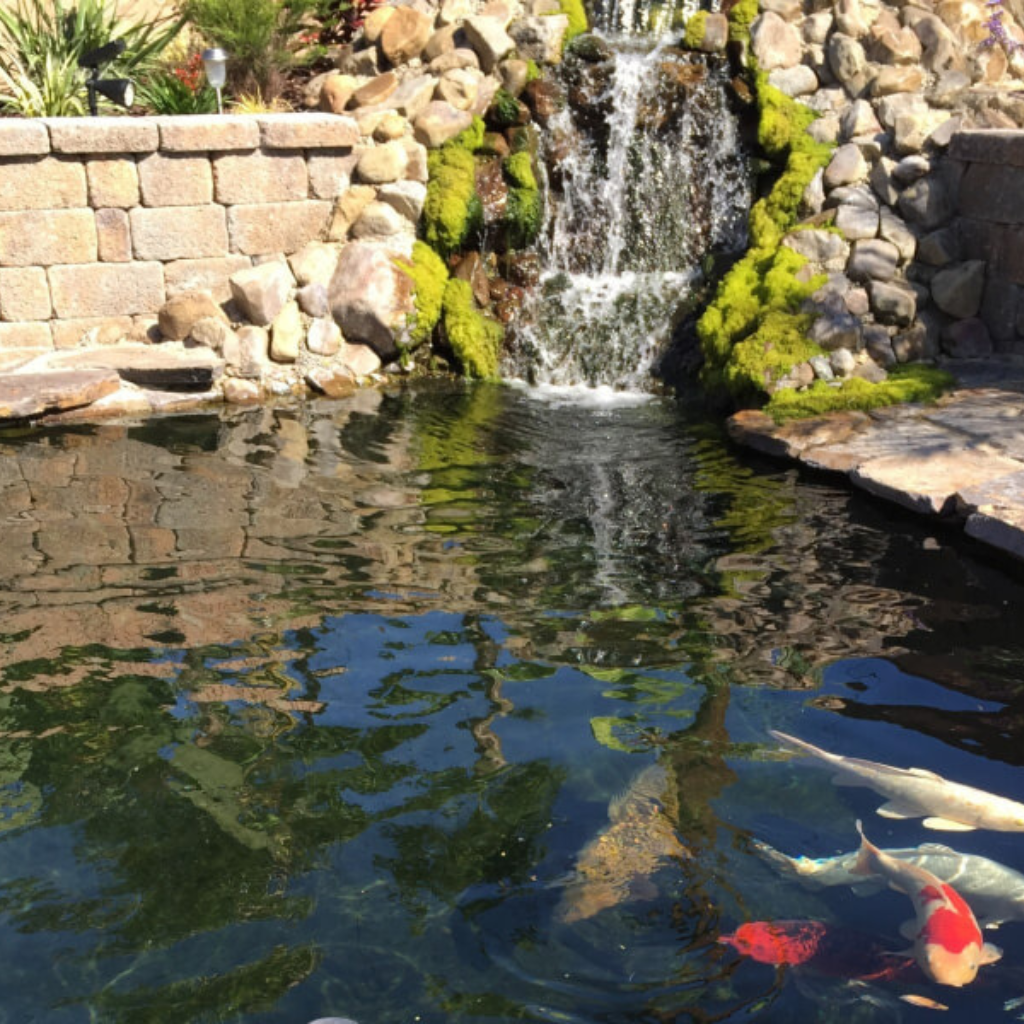
    Waterfalls and fountains do more than look nice. They help oxygenate the water and reduce algae growth. They also create a pleasant sound that makes your garden feel peaceful. However, these features can raise your koi pond installation cost slightly because they require extra equipment.

    Koi Pond Installation Process

    Step 1: Site Preparation

    Site Preparation

    The first step is marking where the pond will go. After that, the area is dug to the right depth and shape. Make sure the pond bottom slopes slightly toward the drain for easier cleaning. Remove sharp stones or roots that could damage the liner.

    Step 2: Installing the Liner and Plumbing

    koi pond construction
    koi pond construction

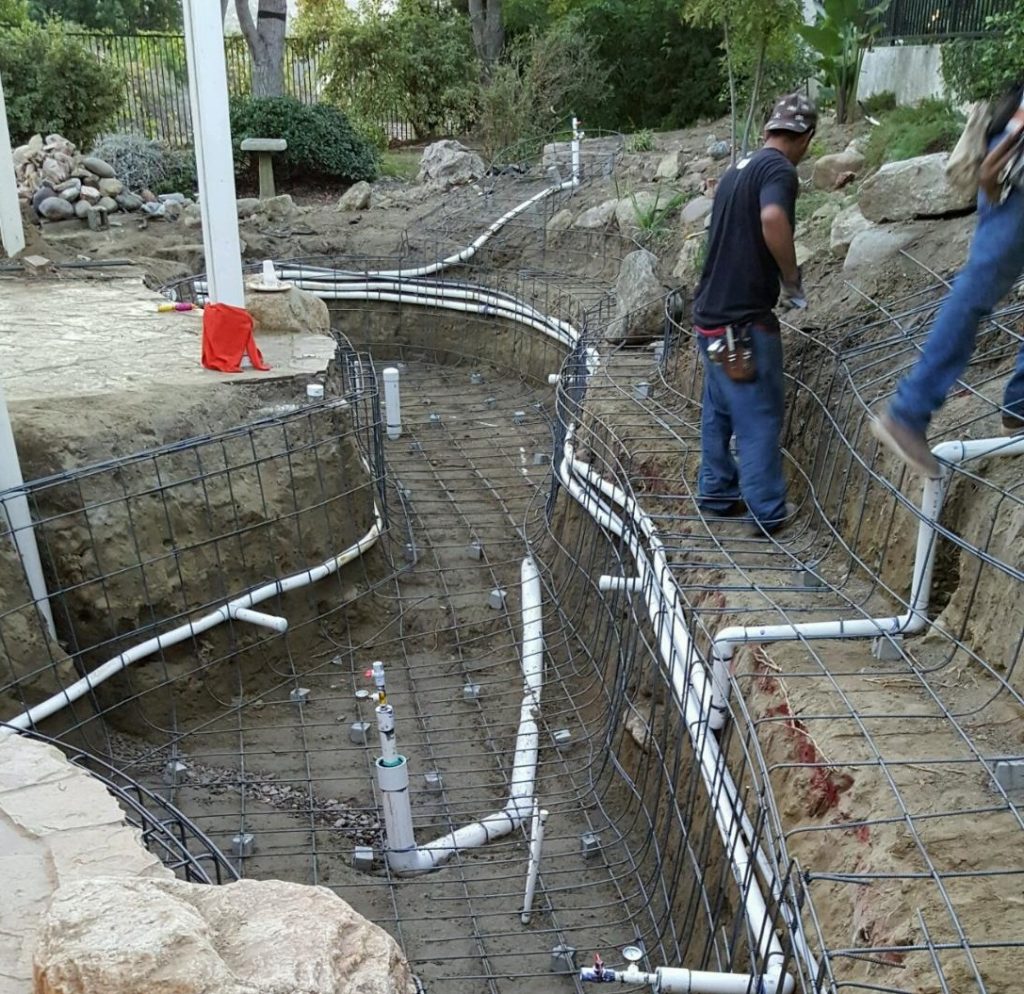
    Once the hole is ready, the liner is spread out carefully. Pipes for water flow and filters are installed before filling the pond. A professional koi pond builder will make sure everything fits well and won’t leak.

    Step 3: Installing the Pump and Filtration System

    Installing the Pump and Filtration System

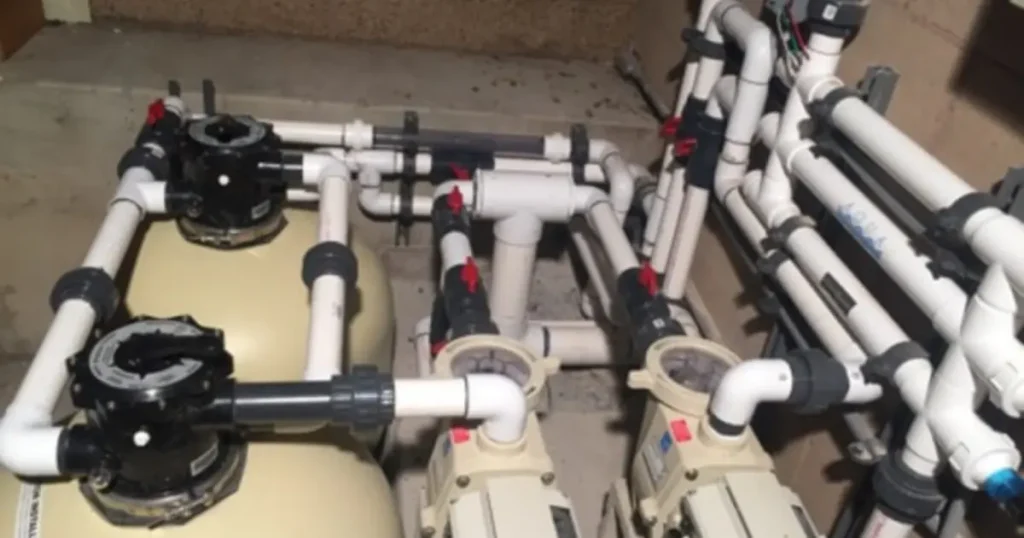
    Next comes the filtration setup. The pump connects to the filters and returns clean water to the pond. The system must run continuously to keep water balanced.

    Step 4: Filling the Pond and Balancing the Water

    After the setup is done, the pond is filled with water. Tap water usually contains chlorine, so it must be treated before adding koi. The water’s pH and temperature should also be tested and balanced.

    Step 5: Adding Rocks, Plants, and Finishing Touches

    Cement Fountain
    backyard pond and fountain maintenance, repair, and construction services for Aliso Viejo properties

    Once the pond is filled, add decorative stones, aquatic plants, and lighting. These make the pond look natural and help with water quality by providing shade and oxygen.

    Step 6: Introducing Koi Fish

    FAQs About Water Fountain Maintenance and Installation

    Never add koi fish right after filling the pond. Wait a few days for the water to stabilize. Start with a few healthy koi and slowly increase their number as the pond ecosystem balances out.

    Koi Pond Installation Cost Breakdown

    Factors That Affect Koi Pond Installation Cost

    Several factors affect cost. The pond’s size, depth, materials, and design all make a difference. The more complex the pond, the higher the price. Extras like waterfalls, lighting, and filtration systems add to the total. Your location also matters, as labor costs vary by region.

    Average Koi Pond Installation Cost Range

    On average, a small koi pond may cost between $3,000 and $6,000. Larger ponds with high-end filtration and custom design can go beyond $10,000. A koi pond contractor will provide an exact quote after seeing your yard and discussing your design choices.

    DIY Koi Pond vs. Hiring a Contractor

    Some homeowners try building their own ponds to save money. However, without proper knowledge, DIY ponds can develop leaks, poor water circulation, or fish health problems. Hiring a professional contractor might cost more upfront but saves money in the long run through proper design and fewer repairs.

    Working with a Koi Pond Contractor

    When to Hire a Professional

    If your project involves complex designs, deep digging, or electrical wiring, it’s best to hire a professional. Contractors understand the technical side — from water flow to pump sizing — and make sure the pond runs well year-round.

    How to Choose the Right Koi Pond Contractor

    Look for contractors who have experience with koi ponds, not just garden ponds. Ask for pictures of previous projects and customer reviews. A good contractor should be licensed, insured, and willing to explain every step.

    Questions to Ask Before Installation

    Ask about the type of liner, filters, and materials they plan to use. Discuss timelines, warranties, and maintenance services. This helps you understand what you’re paying for and ensures no surprises later.

    Understanding the Installation Agreement

    Always get a written contract. It should list costs, materials, schedules, and warranty terms. This protects both you and the contractor if something goes wrong.

    Maintaining Your Koi Pond

    Routine Maintenance Tasks

    Keeping your koi pond clean doesn’t have to be hard. Regularly remove debris, clean the filters, and check the pump. Top up the water when it evaporates. Small weekly tasks prevent bigger problems later.

    Managing Water Quality

    Healthy water means healthy koi. Test the water weekly for pH, ammonia, and nitrate levels. Use dechlorinators and bacteria starters to keep it stable. Cloudy or green water usually means the filter needs cleaning or more aeration.

    Feeding and Caring for Koi Fish

    Feed koi once or twice a day with quality food. Avoid overfeeding since uneaten food affects water quality. During winter, koi eat less as the temperature drops. Always remove leftover food after feeding.

    Seasonal Pond Care

    Each season brings new challenges. In spring, clean the pond and check equipment. In summer, control algae and ensure enough oxygen. In autumn, remove falling leaves. In winter, use a de-icer or aerator to prevent the pond from freezing completely.

    Common Problems with Koi Pond Installation

    Water Leaks and Liner Damage

    Leaks are common if the liner is not installed correctly. Watch for wet spots around the pond. Fix small leaks early before they worsen.

    Green Water or Algae Growth

    Algae appear when water gets too much sunlight or nutrients. Adding plants and improving filtration can help control it.

    Poor Water Circulation

    If parts of the pond are still or smell bad, the pump might be too weak or clogged. Clean and adjust the system as needed.

    Unhealthy Koi Fish

    Stressed or sick koi usually swim near the surface or act sluggish. Poor water quality is often the cause. Check your filter, oxygen levels, and feeding habits.

    Enhancing Your Backyard with a Koi Pond

    Landscaping Around the Pond

    Plants, stones, and small bridges make your pond area more inviting. Choose native plants that don’t need much care.

    Adding Lighting and Seating Areas

    Soft lighting makes the pond safe and beautiful at night. Add benches or a small deck for a comfortable viewing spot.

    Combining a Koi Pond with Other Water Features

    A koi pond can connect with a waterfall or stream for a more natural flow. These features improve water movement and visual appeal.

    Frequently Asked Questions

    How deep should a koi pond be

    At least three feet deep to protect koi from predators and temperature changes.

    Can koi live in small ponds

    Yes, but only a few fish. Overcrowding affects their health.

    Do koi ponds attract mosquitoes

    No, as long as the water keeps moving with pumps or aerators.

    How long does koi pond installation take

    Usually one to three weeks, depending on size and weather.

    Can I build a koi pond myself

    Yes, but a professional contractor ensures proper design and water balance.

    How much maintenance does a koi pond need

    Basic cleaning weekly and deeper maintenance every few months.

    Can I add plants to my koi pond

    Yes. Plants help filter water and give koi shade.

    Conclusion: Bringing Your Dream Koi Pond to Life

    A koi pond can turn any backyard into a calm, living space. It’s not just decoration — it’s a balanced system that supports life and relaxation. With proper planning, quality materials, and regular care, your pond can last for many years.

    If you’re ready to start your project, reach out to a professional koi pond contractor. Koi Pros specializes in designing, installing, and maintaining koi ponds and backyard water gardens. Their team ensures your pond fits your space, budget, and goals.

    Your dream koi pond is only a plan away. Contact Koi Pros at (714) 613-0123 today and start enjoying peaceful mornings beside your own backyard oasis.

  • Backyard Pond Ideas: Transforming Outdoor Spaces

    Backyard Pond Ideas: Transforming Outdoor Spaces

    Cement Fountain

    A backyard pond is one of the most relaxing additions you can make to your home. It turns any outdoor space into a peaceful spot where water, plants, and life come together. Whether you want a fish pond, a water garden, or a simple reflection pool, a pond can make your yard look alive and natural.

    In this full guide, you will learn about design ideas, building steps, costs, and maintenance. You will also learn when it’s best to hire a backyard pond contractor or garden pond builder to make sure your project is done right.

    Why Add a Pond to Your Backyard

    A pond adds more than beauty to your garden. It changes the way your yard feels and how you enjoy your time outside. The sound of running water helps reduce stress. Watching fish swim gives you peace of mind.

    Backyard Ponds Create a Natural Habitat

    When you build a pond, you help local wildlife. Birds come to drink, butterflies land on the water’s edge, and frogs make your garden their home. A pond also balances the environment in your yard.

    A Pond Increases Property Value

    A well-designed pond can make your home look more attractive and unique. It adds interest to your landscaping and can increase your home’s value if you ever decide to sell.

    Ponds Fit Different Purposes

    You can design your pond to suit your needs. Some homeowners want a koi pond. Others prefer a natural pond that blends with the garden. Some want a simple water feature near their patio. A pond can be large or small, deep or shallow, simple or detailed.

    Planning Your Backyard Pond Project

    Before you begin digging, you need a plan. A clear plan saves time, money, and effort.

    Decide the Purpose of Your Pond

    Think about why you want a pond. Do you want to keep fish? Grow plants? Or simply enjoy the sound of water?

    A pond made for fish needs to be deeper. It also needs good filters and aeration. A plant pond needs shallow spots for roots and sunlight. A decorative pond may focus on shape, lighting, and how it fits into your landscape.

    Choose the Right Location

    The best spot for a pond has both sunlight and shade. Sunlight helps water plants grow, while shade keeps the water cool. Avoid putting the pond under trees. Leaves can fall into the water and make cleaning harder.

    Make sure the spot is not too low. Rainwater can carry dirt and chemicals into the pond. A backyard pond contractor can help you check the slope and soil condition before you start.

    Pick the Size and Shape

    The size of your pond depends on your space and purpose. A small pond is easy to manage and fits tight spaces. A large pond looks impressive but needs more care.

    Shapes can be round, oval, or freeform. Natural shapes blend better with plants. Straight edges look modern. A garden pond builder can help you design the right shape for your yard.

    Inspiring Backyard Pond Ideas

    You can design your pond in many ways. Each style creates a different mood and look.

    Natural-Style Backyard Pond

    Natural Pond

    A natural pond looks like it has always been part of your garden. Rocks, gravel, and native plants help create this effect. Water moves slowly, and the edges are soft and green. These ponds attract birds, frogs, and insects. They are also easier to maintain if built correctly.

    Koi Pond Designs

    koi pond

    Koi ponds are known for their bright and colorful fish. Koi need deep water to stay healthy, usually around three feet deep. You also need a strong filter and aerator. A professional pond builder can design the right setup to keep koi safe year-round.

    Modern Backyard Ponds

    Modern ponds are simple and clean. They often have straight lines, smooth surfaces, and still water. Concrete, stone, and LED lights give them a neat look. They go well with modern homes or minimalist gardens.

    Backyard Pond with Waterfall or Stream

    The sound of water running through rocks can make your space more relaxing. A small waterfall or stream adds motion and helps oxygenate the water. It also keeps it clear and prevents algae growth.

    Small Backyard Ponds

    Even if you have a small space, you can still enjoy a pond. Mini ponds or patio ponds are easy to build and care for. They can be made from tubs, barrels, or small preformed liners. A backyard pond contractor can install a small pond that fits perfectly in your limited area.

    Eco-Friendly Pond Designs

    Eco-friendly ponds use natural balance to stay clean. They rely on plants, rocks, and bacteria instead of chemicals. Solar-powered pumps and LED lights make them energy-efficient. You can also collect rainwater to fill your pond.

    Designing Your Backyard Pond

    Building a pond is more than digging a hole. It involves planning every part — from water depth to filtration.

    Choosing the Right Pond Liner

    A liner holds the water in your pond. The most common types are rubber, PVC, and concrete. Rubber liners are flexible and easy to shape. Concrete lasts longer but is harder to install. Your pond contractor can recommend the best liner for your area.

    Adding Filtration and Circulation

    Clean water is key to a healthy pond. A pump keeps water moving, and a filter removes dirt and waste. Proper filtration prevents algae growth and keeps fish and plants healthy.

    Landscaping Around the Pond

    The area around your pond should look natural and balanced. Use rocks, gravel, and plants to create soft edges. Place seating areas or small pathways nearby so you can enjoy the view.

    Adding Lighting and Decoration

    Lighting turns your pond into a night-time feature. Use underwater LED lights or solar lamps. You can add simple decorations like stones, driftwood, or garden statues.

    Choosing Fish and Plants

    Fish and plants bring life to your pond. Choose fish like goldfish, koi, or guppies. Add water lilies, lotus, or floating plants for color and natural cleaning. Plants help filter water and give fish shade.

    Hiring a Backyard Pond Contractor or Garden Pond Builder

    Building a pond can be complex. Hiring a backyard pond contractor ensures your pond is built safely and lasts for years.

    When to Hire a Professional

    You should hire a contractor if your pond has electrical systems, deep digging, or large water features. A professional knows how to manage plumbing, filtration, and waterproofing properly.

    What to Look for in a Pond Builder

    Look for a garden pond builder with experience and good reviews. Ask to see photos of past projects. Check if they are licensed and insured. Professionals can also help you get the right permits if needed.

    Questions to Ask Before Hiring

    Ask how long the project will take and what materials will be used. Find out what’s included in the estimate. Ask if they offer maintenance after installation. A clear conversation helps avoid problems later.

    Understanding Pond Installation Costs

    The cost of building a pond depends on its size and design. A small pond might cost around one to three thousand dollars. A large koi pond with waterfalls and lights could cost over ten thousand.

    While DIY projects seem cheaper, hiring a professional often saves money in the long run. You avoid leaks, equipment issues, and poor design mistakes.

    DIY Backyard Pond Ideas

    If you like hands-on work, building a pond yourself can be rewarding.

    Steps for a DIY Pond

    Start by marking your pond area. Dig a hole that matches your chosen shape. Place the liner carefully and make sure it fits well. Fill the pond with water and smooth out wrinkles. Add your pump, filter, and decorations.

    Common Mistakes to Avoid

    Many first-time builders make the pond too shallow or skip the filter. Some forget to test the water for fish safety. Always plan ahead and do a small test before adding fish or plants.

    When to Call a Professional

    If your pond leaks or the water turns green fast, it may be time to call a backyard pond contractor. They can inspect your setup and fix problems before they become costly.

    Backyard Pond Maintenance and Care

    Taking care of your pond keeps it healthy and beautiful all year round.

    Routine Maintenance Tasks

    Clean your filter regularly. Remove leaves, twigs, and dead plants from the water. Check water levels every week and top up when needed.

    Seasonal Pond Care

    In spring, clean the pond and restart your pumps. In summer, watch for algae and make sure fish have enough oxygen. In autumn, cover the pond with netting to catch falling leaves. In winter, use a pond heater or aerator to keep a small hole open in the ice.

    Handling Common Pond Problems

    If the water becomes cloudy or green, add more plants or check your filter. If your fish are unhealthy, test the water’s pH and oxygen levels. Regular maintenance prevents most of these issues.

    Enhancing Outdoor Spaces with a Pond

    A pond can be the heart of your garden if designed well.

    Blending a Pond with Landscaping

    Add garden paths, flowers, or small benches around your pond. You can also add a wooden deck or bridge for a nice touch.

    Making Your Pond Wildlife-Friendly

    Plant native flowers and grasses. Avoid using pesticides near the pond. This creates a safe space for frogs, birds, and insects.

    Adding Other Water Features

    You can combine your pond with fountains or small streams. These features make your space more dynamic and improve water flow.

    Budget-Friendly Backyard Pond Ideas

    A pond doesn’t have to be expensive. You can start small and still enjoy the results.

    Affordable Pond Materials

    Use pre-formed liners or waterproof tubs. Reuse rocks, old pots, or barrels as pond containers.

    Small Ponds for Tight Spaces

    If your space is small, a mini pond or patio pond works great. Add one or two plants and small fish for a complete look.

    Saving Money Long Term

    Use solar-powered pumps to save energy. Choose low-maintenance plants. Regular cleaning keeps your equipment working longer.

    Frequently Asked Questions

    How much does a backyard pond cost?

    Small ponds can cost a few hundred dollars. Professional installations start around three thousand and can go higher for complex designs.

    How deep should a pond be for koi or goldfish?

    A koi pond should be about three feet deep to protect fish from weather and predators.

    Can I build a pond in a small yard?

    Yes. Even a small yard can fit a small pond or container pond.

    Do ponds attract mosquitoes?

    No, not if water moves. Pumps and fish keep mosquitoes away.

    How long does it take to build a pond?

    Most ponds take between three days and a week to finish.

    Do I need a permit to build a pond?

    Some cities require it. Check with local offices or ask your contractor.

    How can I find a reliable backyard pond contractor near me?

    Look online for local pond builders. Read reviews and ask for recommendations from friends or garden centers.

    Conclusion

    A backyard pond can change your outdoor space into a calm and beautiful place. It connects you with nature and adds value to your home. You can build a simple small pond or a detailed koi pond with a waterfall.

    If you want to start your project, plan carefully and think about your goals. For expert help, contact a trusted backyard pond contractor or garden pond builder like Koi Pros. They can turn your ideas into a lasting water feature that fits your home perfectly.

    Call to Action

    Ready to transform your backyard into a peaceful water paradise? Call Koi Pros at (714) 613-0123 today and start designing your perfect pond.

  • Pond Contractor Guide: Design, Installation, Costs & Maintenance

    Pond Contractor Guide: Design, Installation, Costs & Maintenance

    Backyard Waterfall

    Building a pond in your yard is more than just a decoration project. It brings peace, beauty, and a natural touch to your home. Whether it’s a koi pond, garden pond, or simple backyard water feature, a professional pond contractor helps make your vision come true.

    This Pond Contractor Guide explains everything you need to know about pond design, installation, costs, and maintenance. You’ll also learn what to expect when working with a pond builder and how to care for your pond year-round.

    Understanding the Role of a Pond Contractor

    What a Pond Contractor Does

    A pond contractor designs, builds, and maintains ponds. They understand how water systems work, how to prevent leaks, and how to make the pond safe for fish and plants. From excavation to plumbing and lighting, the contractor manages every stage of construction.

    Services Pond Builders Provide

    A professional pond contractor handles design planning, digging, liner installation, filtration setup, rock placement, and long-term maintenance. They can also repair leaks or upgrade your pond later.

    Difference Between Landscapers and Pond Specialists

    Landscapers work on general outdoor designs like lawns and gardens. Pond specialists focus on water systems, filtration, and aquatic life. If you want a pond that lasts and functions properly, a pond contractor is the right choice.

    When to Hire a Professional

    Small decorative ponds can be done DIY, but if your pond is large, holds fish, or includes electrical pumps, hire a professional. This ensures safety, correct installation, and lasting performance.

    Planning Your Pond Project

    Determining the Purpose of Your Pond

    The first step is to decide why you want a pond. Aesthetic ponds are for beauty and relaxation. Functional ponds are designed for fish, plants, or wildlife. Some homeowners build ponds for reflection and calm spaces, while commercial properties use them to enhance landscapes or attract visitors.

    Choosing the Right Pond Location

    Sunlight and shade both affect pond health. A pond needs several hours of sunlight for plants but not full exposure all day, which can cause algae growth. Avoid areas that collect rainwater or runoff from the garden. Also, check local rules about pond construction. In some areas, you may need a permit for deeper ponds.

    Pond Size and Depth Considerations

    The size of your pond affects its maintenance and cost. Smaller ponds are easier to install but need frequent cleaning. Medium ponds can house koi or goldfish comfortably. Larger ponds allow for better ecosystems and require stronger filtration systems. Deeper ponds are better for fish survival during cold winters.

    Pond Design: Aesthetic and Functional Elements

    Popular Pond Design Styles

    There are many ways to design a pond. Natural ponds blend with the environment and attract birds and frogs. Formal ponds have geometric shapes and clean edges. Koi ponds are built deep for fish and use strong filtration. Eco-friendly ponds use plants and natural filters instead of chemicals.

    Essential Pond Design Components

    Every pond design includes key parts that keep it balanced. The liner prevents water loss. Filtration systems clean and circulate the water. Waterfalls and fountains add movement and oxygen. Lighting brings out beauty at night. Rocks, plants, and edging materials make the pond look natural. Finally, aquatic plants and fish complete the ecosystem.

    Pond Installation Process Explained

    Step-by-Step Pond Construction

    Pond installation starts with site evaluation. The contractor measures and checks the soil. Then, excavation begins to form the pond shape. Once the hole is ready, a liner or concrete base is installed. The contractor adds plumbing and filters, followed by rocks, gravel, and edging. The pond is then filled with water and tested for leaks. Finally, plants and fish are added after the water stabilizes.

    DIY vs Hiring a Pond Contractor

    DIY pond kits seem easy but often lead to problems like leaks and poor water flow. A professional contractor brings the right tools, knowledge, and warranty. While DIY saves money at first, professional installation prevents costly mistakes later.

    Cost of Hiring a Pond Contractor

    Average Pond Installation Costs

    The cost of building a pond depends on its size, materials, and complexity. A small decorative pond might cost around $2,000 to $5,000. A medium backyard pond may range from $5,000 to $10,000. Large koi ponds or custom designs can cost $10,000 to $25,000 or more.

    Factors That Affect Pond Cost

    Several elements influence the total cost. The type of pond, whether koi or garden, matters. Location and soil conditions affect labor time. The materials you choose—rubber liner, PVC, or concrete—change the price. Adding waterfalls, lighting, or advanced filters also increases costs.

    DIY vs Professional Costs

    DIY ponds are cheaper at first but often require repairs. Professional contractors may charge more upfront but save you money through durable construction, better equipment, and ongoing support.

    Pond Maintenance: Keeping Your Pond Healthy

    Routine Maintenance Tasks

    Regular maintenance keeps your pond clear and healthy. Filters and pumps should be cleaned every one to two weeks. Debris such as leaves or algae should be removed regularly. Check water quality often, especially pH and ammonia levels. Fish should be fed properly without overfeeding, as excess food pollutes the water.

    Seasonal Pond Care Tips

    Each season needs special attention. In spring, clean the pond and restart the filtration system. In summer, control algae and ensure proper aeration. In autumn, remove fallen leaves to prevent decay. In winter, prevent ice from sealing the pond completely; an aerator or de-icer keeps oxygen flowing.

    Common Pond Problems and Solutions

    Cloudy water often comes from overfeeding or poor filtration. Clean filters and reduce feeding to fix this. Algae blooms can be reduced by using UV filters or adding floating plants that block sunlight. Fish health problems often mean low oxygen or overcrowding. Pump failure usually means it’s time to clean or replace the device.

    Choosing the Right Pond Contractor

    What to Look for in a Pond Builder

    When selecting a pond builder, check their experience and past projects. A reliable contractor should have a portfolio, certifications, and customer reviews. Ask about warranties and after-service maintenance. These show they take responsibility for their work.

    Questions to Ask Before Hiring

    Ask what the estimate includes, how long the project will take, and if maintenance is offered after installation. Confirm that the contractor has insurance and all needed licenses. Honest answers help you find a trustworthy professional.

    Red Flags to Watch Out For

    Avoid pond builders who offer very low quotes or skip contracts. Lack of insurance or unclear communication is also a warning sign. Always choose a company that provides detailed written agreements.

    Eco-Friendly and Sustainable Pond Solutions

    Using Native Aquatic Plants

    Native plants are low-maintenance and grow naturally in your climate. They support local wildlife like frogs and dragonflies while keeping your pond water balanced.

    Installing Energy-Efficient Equipment

    Modern pond systems can be eco-friendly. Energy-efficient pumps, LED lights, and solar-powered features reduce electricity use and long-term costs.

    Using Natural Filtration Systems

    Instead of relying on chemicals, you can use gravel beds and aquatic plants as natural filters. These systems clean the water while keeping it safe for fish.

    Benefits of Wildlife-Friendly Ponds

    Eco-friendly ponds attract beneficial insects, birds, and amphibians. This creates a small ecosystem that helps the environment and makes your garden feel alive.

    Inspiring Pond Design Ideas & Trends

    Modern Minimalist Pond Designs

    Modern ponds focus on simplicity. They use smooth stones, clear water, and clean lines. These designs fit perfectly in small yards or modern homes.

    Japanese Koi Pond Inspirations

    Japanese-style koi ponds create a peaceful and balanced space. They often include wooden bridges, bamboo accents, and flowing water that adds calm energy to your garden.

    Backyard Ponds with Waterfalls

    Waterfalls bring sound and movement. They keep the water oxygen-rich and make your backyard feel relaxing.

    Smart Pond Systems

    Technology has reached ponds too. Automated systems now let you control pumps, lights, and feeders from your smartphone. They save time and make pond management easy..

    Conclusion

    A pond adds calmness, beauty, and nature to your outdoor space. But to keep it clean, safe, and long-lasting, proper design and professional construction are essential. Hiring an experienced pond contractor saves time, avoids mistakes, and ensures your pond stays healthy for years.

    Whether you want a simple garden pond or a full koi pond, the right professional can turn your idea into reality. For expert koi pond design, installation, and maintenance, consider Koi Pros. Their team specializes in creating beautiful and functional ponds that fit your space, budget, and style.

    Ready to bring your dream pond to life? Call Koi Pros today at (714) 613-0123 to schedule a consultation and start designing your perfect pond.

    FAQs About Pond Contractors and Installation

    How Long Does It Take to Build a Pond

    A small pond usually takes about three to five days to complete. A larger koi pond may need two to three weeks, depending on the design.

    Do You Need a Permit to Build a Pond

    In most cases, small backyard ponds do not need permits. However, larger or deeper ponds might require approval from your local authority.

    Can You Build a Pond on a Slope

    Yes, ponds can be built on sloped areas using retaining walls or terraced designs. A skilled pond contractor will know how to handle uneven ground safely.

    What Is the Best Time to Build a Pond

    Spring and early autumn are the best times. Temperatures are moderate, and plants can settle well before extreme weather.

    How Often Does a Pond Need Cleaning

    A pond should be lightly cleaned weekly and deeply cleaned once or twice a year, depending on its size and the number of fish.

    How to Find a Reliable Pond Contractor Near You

    Search online for “pond builders near me” and check reviews. Ask for photos of past work and request at least two quotes before choosing.

  • Orange county Public Park Water Feature Service

    Orange county Public Park Water Feature Service

    Park Water Feature

    One of the best things about the Orange County parks is that they have splash pads which provide great opportunities for children to stay warm during the summer. You have to pay an entry fee of $2 to enter the Atlantis Play Center in Garden Grove.

    The park has restroom facilities and picnic benches scattered all around. Children and their parents arrive in large numbers to enjoy the splash parks and just love it when the giant bird begins to dump the water when they move close to some marked water spouts.

    There’s always the need for more water features in public parks, as water fountains can reduce the ambient temperature by 2 to 4 degrees and effectively cool a children’s play area located 25 meters away.

    The fun splash pad in Garden Grove has motivated water feature designers to come up with new attractions that combine water play features around splash pads.

    It is now possible to create a family resource center with a skate park, spray pool with water cannons, splash parks, and even a play area within a small splash pad inside an Orange County community garden.

    Koi Pros is keen on setting up water features in public parks and has several designs to support water conservation efforts near the district mall and other areas in Orange County.

    We have ideas for water play areas in Newport Beach, Buena Park, Aliso Viejo, Lambert Road, La Mirada, La Habra, and other places in California similar to the water play areas you find at Buccaneer Bay in Florida.

    Orange County Splash Pads Near Me

    Picnic tables in water parks are set around a splash pad with a spray pool and water cannons. This is the ideal setting for a Labor Day weekend or a Memorial Day weekend picnic.

    Weather permitting, it’s now common for families to engage in some water play at a splash pad close to where they live. Here is some useful information about some of the most popular splash pads in Orange County.

    Stanton Central Park & Splash Pad (Stanton)

    The Stanton Central Park also has a splash pad along with its railroad-themed playground, offering a train-themed play area and a historic train depot.

    Wet Saloon (Stanton)

    This is a splash pad at the Harry M. Dotson Park in Stanton with the water play area open to the public in summer.

    Ponderosa Park (Anaheim)

    Find pop-up fountains, flower-shaped water showers, and water-spray rings in the splash pad of Ponderosa Park at Haster Street. This has the ideal water play area for the summer months of Orange County. You’ll find large groups visiting the park on Memorial Day and Labor Day.

    Continue shopping with your kids and family until you feel the urge to splash and play. Then hurry back to the playground and family community center for some relaxing time.

    Pioneer Road Park (Tustin)

    Open from Memorial Day to Labor Day, you can visit the free Pioneer Road Park splash pad water feature in Tustin from 10 a.m. to 10 p.m. Visitors are free to have some outdoor fun at the large playground area and enjoy their meals at the nearby food court area.

    Frontier Park (Tustin)

    Enjoy the water fun play area at the Frontier Park in Tustin. Set up an outdoor stage near the shaded picnic area for some family activities.

    Lemon Park (Fullerton)

    Popular for its summer spray pool, Lemon Park is a wonderful recreation area with a large playground. The splash pad in this spray park opens on Memorial Day and then remains open daily from June 4th until August 28th.

    Adlena Park (Fullerton)

    Visit the summer spray pool at Adlena Park, Adlena Drive, when it opens on Memorial Day. You can always visit your favorite exhibition at the Fullerton Museum Center, then enjoy the splash pad when it’s open daily from noon until 5 pm from June 4th until August 28th.

    Heritage Park (Irvine)

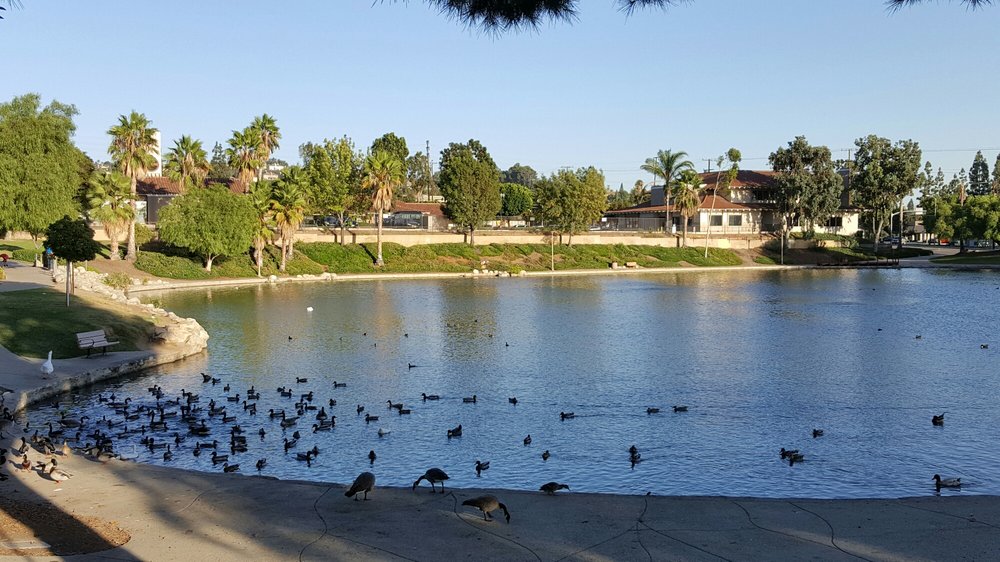
    This is a great place to have a stroll by its lake. Heritage Park also has a beautiful fountain for water play. Kids will love these splash pads and the pool on a hot summer day. This park also has a large playground close to the parking lot site.

    Sigler Park (Wesminster)

    People in Westminster often have their Memorial Day parties at Siglar Park with its splash pad opening on May 28th and then daily from June 18th until September 5th for the 2022 season.

    Crown Valley Splash Pad (Laguna Niguel)

    Located in the City of Laguna Niguel, Crown Valley has a lovely spray ground that will open in the summer of 2022. It also has an aquatics center with recreational swim options and a large center for events and contests.

    Kids and adults can swim, get wet, and play around in their bathing suits before booking a seat for their favorite event at the community center.

    Brenner Park (Buena Park)

    The 25-feet wading pool in Buena Park is just right for kids below 6 years of age to have fun in two-feet deep waters, while the older kids are free to go for a recreational swim at the Boisseranc Park.

    The wading pool opens in May and closes in August, Monday to Friday, from 1 pm to 4 pm. If you’re in the mood for a drive, you can also check out the nearby La Habra splash pad at Brio Park.

    .

  • Pond Rebuilding & Fish Handling 101 – If You Rebuild Your Koi Pond You Need to Handle Your Fish Right?

    Pond Rebuilding & Fish Handling 101 – If You Rebuild Your Koi Pond You Need to Handle Your Fish Right?

    Rebuilding Process (with Fish & Turtle Handling)

    Well, your Koi pond liner has been in there for more than a decade and is starting to show its age now. You may also have a few patches that you put on it. Some of them may have worked well while the others may not have served their purpose. Hence, it is high time that you think of replacing the pond liner. But how are you going to do it without breaking your neck in the process? Without the right kind of planning, you may find yourself in a great mess. Certainly you may have better things to do with your time. So, let’s take a closer look at how we are going to do this. Questions? Feel free to reach out to Koi Pros

    Initial Question – What to do with the Fish and Turtles when you rebuild?

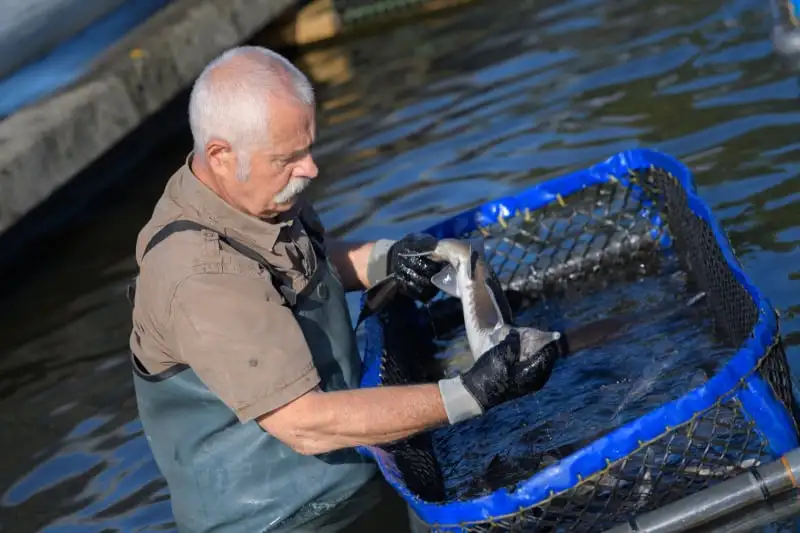
    How many fish are there in your pond? Where are you going to keep the fish until you replace the pond liner? Most likely, it may take more than a day to complete the process and you should consider hiring a company who can handle such a large task. You might expect the items to arrive on time, but they may delay, who knows! If this happens, you may need to store the Koi a lot longer than you expected. This may affect their health. Hence, you need to be on your toes – if you don’t have proper storage, consider calling a local water feature repair service vs risking the lives of your fish or turtles.

    koi fish storage during a pond rebuild

    When rebuilding your water feature, we offer storage and transport of your fish and wildlife

    Water gardening is a type of gardening which deals with the growing of aquatic plants adapted to the pools and ponds. Even though water gardens can be any size or depth, they are mostly small and shallow. They generally measure less than 20 inches in depth. This is supported by the fact that most aquatic plants are depth sensitive and need a specific depth of water in order to grow. The surface area and depth is determined by the species inhabiting the water garden.

    1. If you do have a fish storage tank, here are a few reminders:
      Although storing the Koi can be a bit tricky, they should survive the temporary time they are in the holding tank as long as you follow these simple rules.

    Use the original pond water when filling up the holding tank
    Aerate the water to supply the fish with air and filter the water
    Make sure to have filtration setup to allow water movement
    Make sure to store the fish indoors or cover them as they might be prone to predator issues
    Just because the fish and turtles are in a holding tank, doesn’t mean they don’t require airflow, filtration, and protection. A portion of the water might need to be changed regularly to assist in the filtration process if you don’t have a filter setup. A few days without food will not harm the fish, and overfeeding them won’t do the holding tank ecosystem and good either.

    Not overfeeding them will prevent the extra waste in a smaller environment which would essentially only serve to overwork the filtration system if left unattended to.

    If the holding tank is shallow, make sure to place a net over it. It will prevent the fish from jumping out as well as keep away the predators in search of a free meal.

    1. Make sure you take pictures of the water feature before disassembling
      There are a lot of plants and rocks around the pond that gave it a natural look. The last thing you want is to try to remember how your pond looked before. Most of the time, we take something apart and assemble it again, only to find a handful of extra parts left with you. Such a situation is no fun at all.

    pond liner with a leak exposed

    1. Inspection your liner when you remove material
      This is the time to check for any plumbing issues you might have. Remember the time you first assembled the pond? You did everything right, filled the pond with water and put the fish in the pond. Finally, you saw that one darned pipe! Yes, that pipe that should have been there instead of being here. Now is the time to put it right. Inspect all the plumbing for any sort of wear and tear. In fact, freeze/thaw cycles can play havoc with plastic pipes. Check all the visible joints for any repairs.
      Consider Replacing
    2. Undergarment if you Replace the Liner Entirely
      Make sure you check the undergarment. You may not only require a new liner but find the undergarment deteriorated as well. Since you are replacing the pond liner, why not replace the underlayment too? Do not use old carpets as underlayment. It is quite messy and unprofessional in one way, and it is not the right product for the pond.
    3. When in Doubt – Consider Replacing Entirely
      new pond liner on a pond

    Do not shortcut any process. In fact, the rock that holds the outer edge of the liner in place needs to be removed so that the new liner could be installed properly. Although this type of task is not done that often, we recommend any liner over 10+ years to be restored/ replaced completely. You can lay a new liner ontop of the old if needed, just make sure to order the appropriate amount. If you cheat yourself by skipping these important steps, you may have to soon get back to the yard fixing what should have been done correctly in the first place. Take pride in your work since it will be something that you enjoy day after day. Performing the task right the first time around will help you relax in that lawn chair for longer, instead of toting a shovel later.

    REACH US
    529 W Blueridge Ave #F110 Orange, CA 92865
    (714) 613-0123

  • A Few Tips & Tricks on Backyard Waterfall Installation

    A Few Tips & Tricks on Backyard Waterfall Installation

    We all have been awed by the soothing sounds and serenity of waterfall, always stopping and gazing when out we come across such wonders of nature. The effects of these all-too-fleeting moments have a positive impact, one that we would love to experience even at home. Do not have to hike, cycle, or drive to a tranquil location to enjoy such pleasures; build your rippling brook in your garden which you can in a few days (over the weekends).

    If you take a close look at most backyard waterfalls you will find them riddled with stones and gravel; these can act as filters and they are what you need to set up an artificial stream that comes devoid of too much filtering and cleaning maintenance. You also will need an underground sump or similar installed at the lower end of your waterway that will catch the filtered water and pump it back upstream. Keep in mind that the water will evaporate over time, and thus the need to replace it occasionally.

    pond-less waterfall construction

    What follows in the information given below is a step-by-step guide on how to construct and maintain a waterfall in your garden in no time at all. We cover everything from what you need, knowing the ideal size of the stream, and prepping the setup location to the various stages of the construction project. Something worth an early mention is that you will have to get the expensive kits; instead, you will build the water system with various components that are readily available and will design something that best fits your outdoor space.

    The steps given below will guide you on what to do so that you can do the project successfully. Keep in mind that it may be some heavy work but doable. You will need some digging tools and a wheelbarrow to move the dirt, gravel, and boulders.

    Step 1: Select A Location for your waterfall or pondless waterfall

    Pick your favorite space in your yard and then sit there as you visualize having a waterfall and stream running in your garden. While at it, visualize the ideal spot to install such a water feature. Doing this will help you plan accordingly as you also account for various things that include:

    • Foundation
      Is the soil loss or compact; if the former, then you will have to a bit of excavation. If the ground is solid and difficult to dig, you can opt to set up the stream above ground with a base made of stone.
    • Slope
      For the water to flow with ease, you should ensure there is a gradual slope of a drop of around 2 inches for every 10ft of the length of the steam. If you are thinking of working with a tall waterfall, then make the grade steeper, it will make the water move faster and produce a heavier sound if that is what you aim to achieve.
    • Size
      The size of the stream you wish to install will determine the amount of water to have in the upper pool and the lower basin when the pump is not running. To avoid getting things wrong, strive to achieve five gallons per a linear foot of flowing water with the stream measuring around 3 inches deep and 2 and a half feet wide. We prefer working with our upper pool structure that has a capacity of 240 gallons and the lower basin holding 40 gallons. The two can support a stream requiring 75 gallons of water.
    • Sound
      A waterfall that is around 2 – 4 inches high is ideal if you are looking for something that generates enough noise. If you desire more noise, then you should get a waterfall that is 10inches or more in height.
    • Location
      It is pointless to install a waterfall that is not visible from the main area of your yard be it the patio or deck or even the living room. If you wish to enjoy the relaxing sounds of the flowing waters, then consider setting up the features close to your house. It can be near the bedroom if you wish to take in the sounds when in bed. Also, take into account proximity to a power source more so for the pump installed at the lower end of the stream. You also have to ensure that the spot you pick is one that you can reach with a garden hose for those moments when you need to add water.

    For instance, you have an S-shaped stream next to your patio in your perennial garden and include a waterfall with sections of varied heights. Also, vary the width of the stream at is transitions from the waterfall to the lower basin so that you achieve something that looks natural.

    stone stacked on pallets

    Step 2: Order Stone

    Quarries, Gravel, Sand, and Rocks, you should think along those lines when searching for stones to use for your new water feature. You can search online as well as in the Yellow Pages. If you find contacts, get in touch with the suppliers to inquire about the kind of stones available (the size, quality, texture, and color) and prices as you also schedule to visit the supplier to see if what they have it exactly what you want. You can even get some suppliers to deliver the product based on stone type and size sorted in bags which means you will not have to worry about having boulder and piles of gravel and sand on your driveway.

    For gravel, go for stones that are around 3/4 to 2 inches in size, and you will require around half a ton per ten feet of stream. The upper and lower pools will need around one to one and a half ton.

    For the boulders, go for rocks that are around 6 to 24 inches in size that you will use to line the banks of the stream working with approximately 3/4 ton per ten feet of stream. You will also need bigger boulders of 12 to 24 inches in size to the upper and lower basins.

    When buying the boulders, do not go for limestone because it can encourage the growth of algae. And if you are thinking of working with colorful rocks, be ready to dig a bit deeper into your pockets.

    Quick Note: Before ripping the ground open to pave way for the water feature, call 811 to have all the underground utilities in your yard marked.

    tractor excavating a pond and stream in backyard

    Step 3: Map the stream and start excavating

    Once your gravel, sand, and rocks arrive, you can begin mapping out the design and them draw it on the site with spray paint.

    You can start with the upper half of the water feature where you will have the waterfall; it should be done above the ground. Carve is lower half to about 15feet as you excavate the soil. Remember to work smart instead of hard so that you dig with ease without making your muscles too sore.

    After you are done with the upper pool proceed to work on the lower basin which will have the sump pump and much of the stone and gravels surrounding it; dig a hole that is 6 inches deeper than the ground height and around 2 feet wider in diameter at the top than the base. It should be comparatively wider than the stream.

    When done with the upper pool and stretching out the stream leading to the lower basin, build a ring of rocks around the upper and lower basin foundation as well as the banks of the stream. Have the tall stones with their flat side facing upwards to allow the next layer of rocks that will be placed on top to fit securely. If you need to pack the gravel and dirt tightly, use a rubber mallet so that you avoid breaking the stones.

    Step 4: Complete the lower basin first

    When done with the first phase, you should check for sharp objects in the lower pool and the end of the stream before you spread a liner or underlayment. You should have the correct measures of the area so that you avoid making excessive cuts resulting in wastage of the underlayment.

    Ensure the liner is a perfect fit and have it tucked in all corners; give it an extension of about two feet out of the pool. Original content source: koipros.com – You can then proceed to install the pump as well as the water line and ensure it runs up to the upper pool. You can then add around two layers of gravel and stones around the basin.

    Step 5: Dig out or build the drop

    If you have flat grounds, then you need to build up the waterfall above ground and ensure you target to achieve a streambed depth. If you have a sloppy yard, then dig down to the approximate drop depth. You will then start from the base of the stream carving a streambed of 2 to 3.5 feet wide and a 6 to 8 inches deep, as you dig the slope moving upwards to reach the streambed depth target at the waterfall drop where you will then dig out a shallow pool that will slow the flow of falling water.

    For the waterfall built above ground, you may need to add a row of stones for the waterfall, ensure the stones are level and are of about 6 inches. Make a mixture of gravel and dirt and compact it on the inside and exterior of the upper pool rocks before you tamp down the area as well as the streambed.

    team of guys laying a pond liner after re-bar was laid

    Step 6: Spread the liner and position waterfall stones

    The underlayment and liner should be spread running from the lower basin to the upper pool and a bit of slack allowed at the base of the waterfall so that the boulders do not stretch and rip it apart. You then proceed to place the huge boulders decoratively at either side of the waterfall having a rubber liner attached at the base of each rock to prevent it from tearing the underlayment.

    To create above-ground stream edges that are stable, fill the back of the edging stones with a mixture of dirt and small gravel then compact it using a rubber mallet. You can then proceed to lay an underlayment in the upper pool ensuring that it tucks in at all corners and has an allowance of 2 feet. You can overlap the top liner with the one underneath so that you avoid having to tape the underlayment and then add a layer of gravel and stones on top, spreading around the upper pool.

    Step 7: Add spill stones and foam the gaps

    The next phase will see you introduce flat spill stones. You will need to use black expanding foam sealant made for the waterfall, natural pools, and ponds. Apply the sealant to the underside of the stones so that they can adhere to the rubber underlayment. Fill any gaps with small stones so that water can be forced to flow only over the waterfall. Apply the sealant on all side of the spill stones so that you achieve a complete seal and allow it to dry for around thirty minutes.

    You then pull your garden hose and run the water allowing it to flow down the stream to the lower basin. Check for leaks (water trails) underneath and along the spill stone edges so that you can add more foam sealant; do this until the water only flows over the spill stones.

    Step 8: Add gravel and clean the stream

    The last stages of the construction will involve the placement of steppingstones in the stream; they should be in the middle so that people and animals can cross over. Take note of any exposed liner and cover with a layer or gravel.

    Spray the entire stream with water until the water level is above the gravel in the lower pool. When the basin is filled up, get the pump running, and the connect water line directed away from the stream. Keep the hosing down the steam until you see the water coming from the water line connected to the pump is clear; only then will you direct the water line up to the upper pool. Ensure that you surely lay it so that it stays hidden as you also check for any visible rubber liner that you need to trim and cover.

    When all is done, and everything is running seamlessly and looks breath-taking, you can pull up a chair with a cold beer or beverage in hand as you sit down and relax so that you can taking in the soothing sounds of your new garden waterfall and stream.

    Additional Tip: Make sure that you know the various tools you need for the project and have them lined up; make sure you know how to use each so that you can save time and avoid injuries and frustrations..

    If you have any questions or want to hire a professional pond service please contact us (714) 613-0123

    REACH US

    529 W Blueridge Ave #F110 Orange, CA 92865

    (714) 613-0123

    [email protected]

    Original Content Source: www.koipros.com

  • What to Do When Your Pond Pump Not Working?

    What to Do When Your Pond Pump Not Working?

    Pond Pump

    If your pond pump isn’t priming or your equipment isn’t working like it should, you’re not alone. Many pond owners face the same issues, from low water levels to clogged impellers or leaky fittings. In this guide, we break down the most common reasons your pond pump stops working properly and show practical, step-by-step solutions to get it running again. Whether it’s checking your skimmer seal, cleaning the strainer basket, or troubleshooting leaks, this post will help you quickly identify the problem and restore your pond’s circulation. Read on to keep your pond healthy and your equipment performing at its best.

    What to Do When Your Pond Equipment Stops Working Properly

    Often with pond maintenance we see clients struggling to get their pond pumps able to prime again. This is a very common issue as these pumps (external centrifugal pool pumps) require an air-tight fit and be filled with enough water to catch. If you are struggling with this, here are a few areas to consider when having pump priming issues.

    Sometimes debris backs up the pump’s impeller. Take the impeller off and get rid of anything that could be blocking it.

    Pump Priming Problems

    There are several reasons why your pump won’t prime. If you are unable to solve the issue by the time this article is over, contact a pond equipment repair company. Read on to learn the most common issues associated with the pump, as well as how to solve the situation.

    Low Water Level

    The water level in the koi pond/ waterfall is not high enough. You can fill the pond or waterfall up and mark the edge of where it was when you filled it up. Check it 24-48 hours after filling it to see if the water is still level.

    Skimmer Seal or valve seal is Bad

    Check your skimmer seal / opening
    The water should be at the mid-level or higher in order for the pump to work properly. If it is not, the circulation system could take in air via the skimmer. If too much air goes in, the pump will not prime. Take off the cover. Look for the gasket and take it off as well. Look to see if it is in good working order. Typically, it is the gasket that is causing issues; if this is the case, put in a new one. Add a little lubricant when you put it in. Vaseline is not appropriate for this situation. Put the cover back on and make sure everything is secure. Do not tighten it with a tool, because you may inadvertently do too much.

    This is what a High Quality Asahi Valve looks like

    The strainer basket might have something in the way

    Take out the skimmer basket and clean it to remove any issues. Use a hose for the best results. Often-times, large debris can get sucked into the filter. From rocks, to vegetation, to fish, and other wildlife. Making sure your filtration returns are covered appropriately on the ponds edge is very important for good pond circulation. Pond pumps can pull around these objects and cause the water pressure to drop significantly.

    Pump Impeller is broken

    Pond pump impellers will eventually ware out. Sometimes due to water cavitation (caused by many things) or simply debris getting lodged in the pump over time. Original Content Source koipros.com – Not all filtration will capture particulate capable of eroding your pump impeller. Which is why it’s important to have different stages of filtration.

    Different Stages of Filtration

    • Skimmer Basket (to collect heavy debris)
    • Filtration Media (to collect the fine particulate)
    • Ultra Violet Light (to kill bad bacteria)

    The glued fittings have leaks.

    There are glued fittings near the suction area of the pump. Occasionally, the glue is not evenly distributed around the pipe. As a result, there will be air channels that pop up. Sometimes, when the pump is turned on, water then comes out of this opening. If the pump works as it is supposed to, air is sucked in the hole. If you do not notice any water coming out, flip the pump on and put a little water near the joint. If water moves in, there is a hole present.

    The threaded fittings have leaks.

    Does the pump have threaded fittings near the suction side? There could be a leak. As with the glued fittings, test to see if there is a problem. If there is, remove the fitting and put plumbing tape around it (about four layers). There is more help available in the “How to Glue Pool Fixtures Together” guide. Also consider if one of these fittings is closed when it should be open, sometimes these get turned off and issues arise. If you still can’t figure it out – Give us a call today (714) 613-0123

    Call to Action

    Maintaining a healthy pond doesn’t have to be complicated. If your pond pump isn’t priming or you notice other equipment issues, follow the steps in this guide to troubleshoot and fix the problem.

    Need extra help or want an expert to take a look? Contact us today and our team can guide you or provide professional pond equipment repair services.

    Reach Us:
    529 W Blueridge Ave #F110
    Orange, CA 92865
    📞 (714) 613-0123

    Conclusion

    A pond pump that won’t prime or other equipment issues can be frustrating, but most problems are fixable with careful troubleshooting. By checking water levels, inspecting seals and fittings, cleaning the impeller, and maintaining proper filtration, you can keep your pond running smoothly and your fish healthy.

    Regular maintenance and timely fixes prevent small problems from becoming costly repairs. If you’ve tried these steps and your pond equipment still isn’t working properly, don’t hesitate to contact our experts. With the right guidance, your pond can stay clean, healthy, and enjoyable year-round.

    FAQs

    Q1: Why won’t my pond pump prime?

    A: Common reasons include low water levels, air entering through a bad skimmer seal, clogged impellers, or leaks in suction fittings. Check each of these areas carefully.

    Q2: How do I clean a pond pump impeller?

    A: Turn off the pump, remove the impeller, and clear away any debris using water or a soft brush. Avoid using harsh tools that could damage it.

    Q3: How often should I check my pond equipment?

    A: Inspect your pond pump, skimmer, and filtration system at least once a month. Clean baskets, filters, and remove debris regularly to prevent issues.

    Q4: Can I fix leaks in my pond pump fittings myself?

    A: Yes. Glued fittings may need re-gluing, and threaded fittings can be sealed with plumbing tape. Make sure to test for leaks before restarting the pump.

    Q5: When should I call a professional?

    A: If you’ve tried the basic troubleshooting steps and the pump still doesn’t prime or equipment fails, it’s time to contact a pond equipment repair company.

  • How to DIY an outdoor fountain in a lake

    How to DIY an outdoor fountain in a lake

    If you have a lake or pond on your property, adding an outdoor water fountain can bring your water feature to life. Not only can a beautiful water feature help in adding value to your property, but it can also be aesthetically speaking for yourself and guests. After all, who wants a boring pond or lake anyways right?!

    Contrary to popular belief, adding a fountain doesn’t require a whole lot and isn’t terribly difficult either. In fact, it’s quite simple to do, and no special skills are required. Here’s how:

    Step #1: Fountain container

    First thing’s first – You’ll want to measure your lake’s or pond depth. You’ll want to make sure that these measurements where you’ll want your outdoor lake fountain installation to be as well. Sometimes it’s worth having someone on shore take a picture of you to review if you do in fact want the fountain in that spot of your lake.

    With that being said, you’ll have to either take a small boat or consider a float tube, worse case swim! Maybe consider this your training since you’ll be spending most of your time here if you’re going to continue with the project.

    Step #2: Plumbing & Fittings

    One of the most crucial parts of your fountain is the piping and plumbing. Start by measuring your pump’s height with a rigid tube attached to it. Stop with the tube and cut it at your desired height. Take note that the length of your tube should be above the water level. These PVC tubes are readily available at nurseries or hardware stores. We will often lay the pipes along the shore, measure, cut, and not glue until we are 100% sure on placement and fittings. We always suggest using ASAHI Ball-Valves as these can last over 20 years, and can be removed easily.

    Step #3: Pump & Head

    When you’re installing a fountain on your lake, it’s best not to place it directly on the ground, as your equipment can become clogged with debris and other pollutants. Instead, look for a flat rock where you can securely place the pump – one that’s also big enough to make sure that it doesn’t fall over. Worse case you can always make one or consider using a floating island like such to hold simple equipment. In regards to “Head” this is the distance your pump has to pump in order to reach the fountain, you want to limit this distance as much as possible or your pump might not powerful enough to supply your fountain with water.

    When you’re purchasing a pump, make sure that the one you purchase comes with a filter or else be ready to make one. This is to make sure that the water intake is covered and that dirt and debris will not gush into your pump. If the one that you’ve purchased doesn’t have a filter, try to place a hose towards the intake and position it towards the end of the hose going to the lake floor.

    Step #4: Positioning Your Fountain

    So you think you’re ready to position your outdoor fountain and into your lake. Start by positioning your pump on the rock or island you’ve chosen. When doing so, make sure that the rigid tube is pointed up so the projection is outside the water. You can use this as is, or, alternatively, you may also purchase additional fountain attachments that are placed at the end of the tube. These attachments come with various designs and are typically easy to attach to the pipe. These will give your fountain various effects on how the water comes out.

    Step #5: Securing the Fountain

    Make sure that your fountain is secured and is placed somewhere it won’t tip over. You can secure your fountain by using a rigid netting mechanism or weighed system attached to the floor of your lake (like an anchor) If you go this route, start by cutting a hole in the center – make sure that it’s large enough so that the tube can fit. Then get stakes that are similar to size to the water’s depth. Attach stakes per each netting’s end and push it underground. Do it on both sides. Doing this will ensure that your fountain doesn’t move around and that it stays in one place.

    Step #6: Finalizing

    The last step to make sure that the fountain works is by attaching it to a power source. Don’t worry about the pump’s cord. They’re usually waterproof and submersible. However, the plug itself shouldn’t get in contact with water, so make sure that you plug it into a dry outlet. Plug your pump to an electrical outlet – and voila! You now have a working outdoor fountain by your lake. You may find yourself adjusting the pump’s flow by turning it up or down. You can also use solar power on the floating islands to charge a power-bank for your fountain.

    Final Tip

    Once the fountain is running, watch it for a few days. Adjust the pump or position if needed. Clean the filter often to keep water flowing smoothly.

    Ready to Build Your Fountain?

    You now know the steps to make your own outdoor fountain for a lake or pond. Start small, keep it simple, and enjoy the fresh look and sound it brings to your water.

    If you’re ready, grab your pump and supplies today and get started. Your lake or pond will thank you!

    Not sure where to begin? Feel free to contact us

    Contact Us:

    529 W Blueridge Ave #F110
    Orange, CA 92865

    For more tips, visitour website or Call Us