Author: koiXadpeminiros

  • A Few Tips & Tricks on Backyard Waterfall Installation

    We all have been awed by the soothing sounds and serenity of waterfall, always stopping and gazing when out we come across such wonders of nature. The effects of these all-too-fleeting moments have a positive impact, one that we would love to experience even at home. Do not have to hike, cycle, or drive to a tranquil location to enjoy such pleasures; build your rippling brook in your garden which you can in a few days (over the weekends).

    If you take a close look at most backyard waterfalls you will find them riddled with stones and gravel; these can act as filters and they are what you need to set up an artificial stream that comes devoid of too much filtering and cleaning maintenance. You also will need an underground sump or similar installed at the lower end of your waterway that will catch the filtered water and pump it back upstream. Keep in mind that the water will evaporate over time, and thus the need to replace it occasionally.

    pond-less waterfall construction

    What follows in the information given below is a step-by-step guide on how to construct and maintain a waterfall in your garden in no time at all. We cover everything from what you need, knowing the ideal size of the stream, and prepping the setup location to the various stages of the construction project. Something worth an early mention is that you will have to get the expensive kits; instead, you will build the water system with various components that are readily available and will design something that best fits your outdoor space.

    The steps given below will guide you on what to do so that you can do the project successfully. Keep in mind that it may be some heavy work but doable. You will need some digging tools and a wheelbarrow to move the dirt, gravel, and boulders.

    Step 1: Select A Location for your waterfall or pondless waterfall

    Pick your favorite space in your yard and then sit there as you visualize having a waterfall and stream running in your garden. While at it, visualize the ideal spot to install such a water feature. Doing this will help you plan accordingly as you also account for various things that include:

    • Foundation
      Is the soil loss or compact; if the former, then you will have to a bit of excavation. If the ground is solid and difficult to dig, you can opt to set up the stream above ground with a base made of stone.
    • Slope
      For the water to flow with ease, you should ensure there is a gradual slope of a drop of around 2 inches for every 10ft of the length of the steam. If you are thinking of working with a tall waterfall, then make the grade steeper, it will make the water move faster and produce a heavier sound if that is what you aim to achieve.
    • Size
      The size of the stream you wish to install will determine the amount of water to have in the upper pool and the lower basin when the pump is not running. To avoid getting things wrong, strive to achieve five gallons per a linear foot of flowing water with the stream measuring around 3 inches deep and 2 and a half feet wide. We prefer working with our upper pool structure that has a capacity of 240 gallons and the lower basin holding 40 gallons. The two can support a stream requiring 75 gallons of water.
    • Sound
      A waterfall that is around 2 – 4 inches high is ideal if you are looking for something that generates enough noise. If you desire more noise, then you should get a waterfall that is 10inches or more in height.
    • Location
      It is pointless to install a waterfall that is not visible from the main area of your yard be it the patio or deck or even the living room. If you wish to enjoy the relaxing sounds of the flowing waters, then consider setting up the features close to your house. It can be near the bedroom if you wish to take in the sounds when in bed. Also, take into account proximity to a power source more so for the pump installed at the lower end of the stream. You also have to ensure that the spot you pick is one that you can reach with a garden hose for those moments when you need to add water.

    For instance, you have an S-shaped stream next to your patio in your perennial garden and include a waterfall with sections of varied heights. Also, vary the width of the stream at is transitions from the waterfall to the lower basin so that you achieve something that looks natural.

    stone stacked on pallets

    Step 2: Order Stone

    Quarries, Gravel, Sand, and Rocks, you should think along those lines when searching for stones to use for your new water feature. You can search online as well as in the Yellow Pages. If you find contacts, get in touch with the suppliers to inquire about the kind of stones available (the size, quality, texture, and color) and prices as you also schedule to visit the supplier to see if what they have it exactly what you want. You can even get some suppliers to deliver the product based on stone type and size sorted in bags which means you will not have to worry about having boulder and piles of gravel and sand on your driveway.

    For gravel, go for stones that are around 3/4 to 2 inches in size, and you will require around half a ton per ten feet of stream. The upper and lower pools will need around one to one and a half ton.

    For the boulders, go for rocks that are around 6 to 24 inches in size that you will use to line the banks of the stream working with approximately 3/4 ton per ten feet of stream. You will also need bigger boulders of 12 to 24 inches in size to the upper and lower basins.

    When buying the boulders, do not go for limestone because it can encourage the growth of algae. And if you are thinking of working with colorful rocks, be ready to dig a bit deeper into your pockets.

    Quick Note: Before ripping the ground open to pave way for the water feature, call 811 to have all the underground utilities in your yard marked.

    tractor excavating a pond and stream in backyard

    Step 3: Map the stream and start excavating

    Once your gravel, sand, and rocks arrive, you can begin mapping out the design and them draw it on the site with spray paint.

    You can start with the upper half of the water feature where you will have the waterfall; it should be done above the ground. Carve is lower half to about 15feet as you excavate the soil. Remember to work smart instead of hard so that you dig with ease without making your muscles too sore.

    After you are done with the upper pool proceed to work on the lower basin which will have the sump pump and much of the stone and gravels surrounding it; dig a hole that is 6 inches deeper than the ground height and around 2 feet wider in diameter at the top than the base. It should be comparatively wider than the stream.

    When done with the upper pool and stretching out the stream leading to the lower basin, build a ring of rocks around the upper and lower basin foundation as well as the banks of the stream. Have the tall stones with their flat side facing upwards to allow the next layer of rocks that will be placed on top to fit securely. If you need to pack the gravel and dirt tightly, use a rubber mallet so that you avoid breaking the stones.

    Step 4: Complete the lower basin first

    When done with the first phase, you should check for sharp objects in the lower pool and the end of the stream before you spread a liner or underlayment. You should have the correct measures of the area so that you avoid making excessive cuts resulting in wastage of the underlayment.

    Ensure the liner is a perfect fit and have it tucked in all corners; give it an extension of about two feet out of the pool. Original content source: koipros.com – You can then proceed to install the pump as well as the water line and ensure it runs up to the upper pool. You can then add around two layers of gravel and stones around the basin.

    Step 5: Dig out or build the drop

    If you have flat grounds, then you need to build up the waterfall above ground and ensure you target to achieve a streambed depth. If you have a sloppy yard, then dig down to the approximate drop depth. You will then start from the base of the stream carving a streambed of 2 to 3.5 feet wide and a 6 to 8 inches deep, as you dig the slope moving upwards to reach the streambed depth target at the waterfall drop where you will then dig out a shallow pool that will slow the flow of falling water.

    For the waterfall built above ground, you may need to add a row of stones for the waterfall, ensure the stones are level and are of about 6 inches. Make a mixture of gravel and dirt and compact it on the inside and exterior of the upper pool rocks before you tamp down the area as well as the streambed.

    team of guys laying a pond liner after re-bar was laid

    Step 6: Spread the liner and position waterfall stones

    The underlayment and liner should be spread running from the lower basin to the upper pool and a bit of slack allowed at the base of the waterfall so that the boulders do not stretch and rip it apart. You then proceed to place the huge boulders decoratively at either side of the waterfall having a rubber liner attached at the base of each rock to prevent it from tearing the underlayment.

    To create above-ground stream edges that are stable, fill the back of the edging stones with a mixture of dirt and small gravel then compact it using a rubber mallet. You can then proceed to lay an underlayment in the upper pool ensuring that it tucks in at all corners and has an allowance of 2 feet. You can overlap the top liner with the one underneath so that you avoid having to tape the underlayment and then add a layer of gravel and stones on top, spreading around the upper pool.

    Step 7: Add spill stones and foam the gaps

    The next phase will see you introduce flat spill stones. You will need to use black expanding foam sealant made for the waterfall, natural pools, and ponds. Apply the sealant to the underside of the stones so that they can adhere to the rubber underlayment. Fill any gaps with small stones so that water can be forced to flow only over the waterfall. Apply the sealant on all side of the spill stones so that you achieve a complete seal and allow it to dry for around thirty minutes.

    You then pull your garden hose and run the water allowing it to flow down the stream to the lower basin. Check for leaks (water trails) underneath and along the spill stone edges so that you can add more foam sealant; do this until the water only flows over the spill stones.

    Step 8: Add gravel and clean the stream

    The last stages of the construction will involve the placement of steppingstones in the stream; they should be in the middle so that people and animals can cross over. Take note of any exposed liner and cover with a layer or gravel.

    Spray the entire stream with water until the water level is above the gravel in the lower pool. When the basin is filled up, get the pump running, and the connect water line directed away from the stream. Keep the hosing down the steam until you see the water coming from the water line connected to the pump is clear; only then will you direct the water line up to the upper pool. Ensure that you surely lay it so that it stays hidden as you also check for any visible rubber liner that you need to trim and cover.

    When all is done, and everything is running seamlessly and looks breath-taking, you can pull up a chair with a cold beer or beverage in hand as you sit down and relax so that you can taking in the soothing sounds of your new garden waterfall and stream.

    Additional Tip: Make sure that you know the various tools you need for the project and have them lined up; make sure you know how to use each so that you can save time and avoid injuries and frustrations..

    If you have any questions or want to hire a professional pond service please contact us (714) 613-0123

    REACH US

    529 W Blueridge Ave #F110 Orange, CA 92865

    (714) 613-0123

    [email protected]

    Original Content Source: www.koipros.com
  • What to Do When Your Pond Pump Not Working?

    Pond Pump

    If your pond pump isn’t priming or your equipment isn’t working like it should, you’re not alone. Many pond owners face the same issues, from low water levels to clogged impellers or leaky fittings. In this guide, we break down the most common reasons your pond pump stops working properly and show practical, step-by-step solutions to get it running again. Whether it’s checking your skimmer seal, cleaning the strainer basket, or troubleshooting leaks, this post will help you quickly identify the problem and restore your pond’s circulation. Read on to keep your pond healthy and your equipment performing at its best.

    What to Do When Your Pond Equipment Stops Working Properly

    Often with pond maintenance we see clients struggling to get their pond pumps able to prime again. This is a very common issue as these pumps (external centrifugal pool pumps) require an air-tight fit and be filled with enough water to catch. If you are struggling with this, here are a few areas to consider when having pump priming issues.

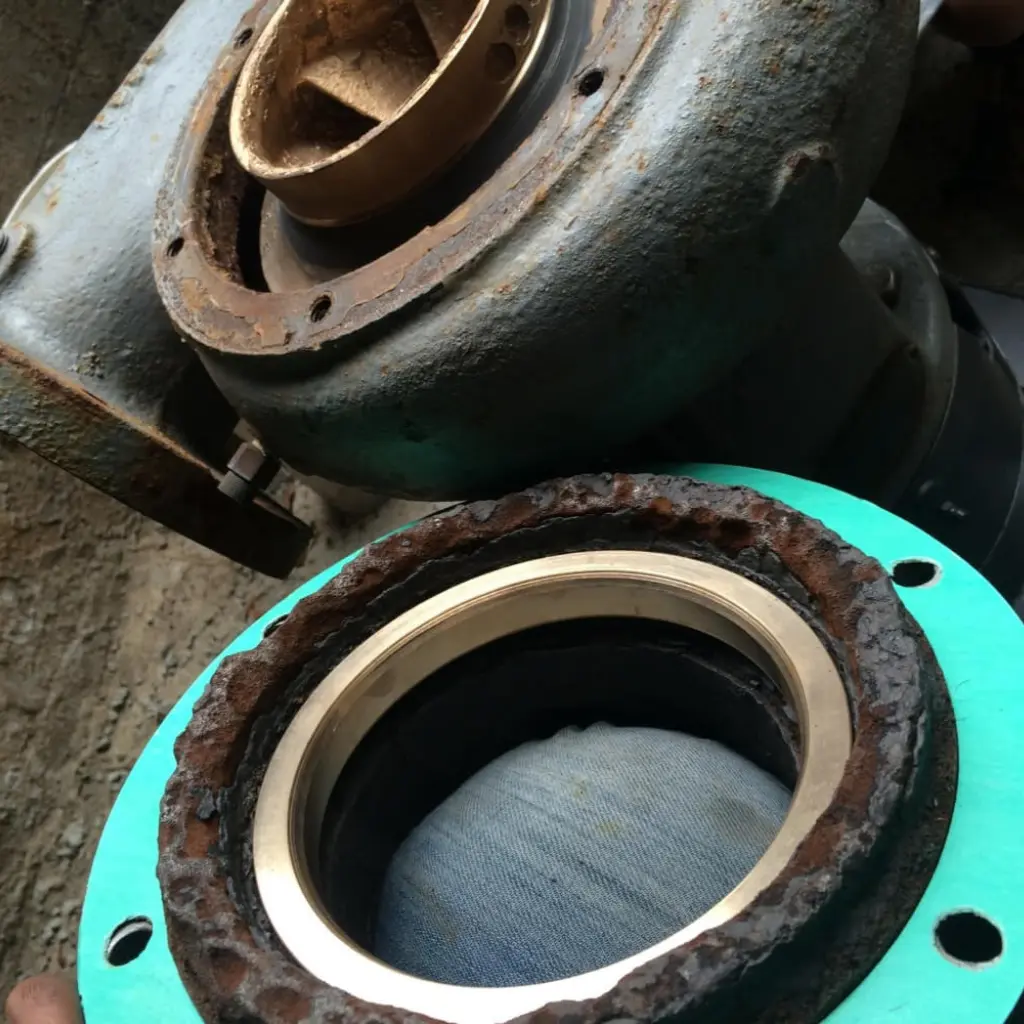
    Sometimes debris backs up the pump’s impeller. Take the impeller off and get rid of anything that could be blocking it.

    Pump Priming Problems

    There are several reasons why your pump won’t prime. If you are unable to solve the issue by the time this article is over, contact a pond equipment repair company. Read on to learn the most common issues associated with the pump, as well as how to solve the situation.

    Low Water Level

    The water level in the koi pond/ waterfall is not high enough. You can fill the pond or waterfall up and mark the edge of where it was when you filled it up. Check it 24-48 hours after filling it to see if the water is still level.

    Skimmer Seal or valve seal is Bad

    Check your skimmer seal / opening
    The water should be at the mid-level or higher in order for the pump to work properly. If it is not, the circulation system could take in air via the skimmer. If too much air goes in, the pump will not prime. Take off the cover. Look for the gasket and take it off as well. Look to see if it is in good working order. Typically, it is the gasket that is causing issues; if this is the case, put in a new one. Add a little lubricant when you put it in. Vaseline is not appropriate for this situation. Put the cover back on and make sure everything is secure. Do not tighten it with a tool, because you may inadvertently do too much.

    This is what a High Quality Asahi Valve looks like

    The strainer basket might have something in the way

    Take out the skimmer basket and clean it to remove any issues. Use a hose for the best results. Often-times, large debris can get sucked into the filter. From rocks, to vegetation, to fish, and other wildlife. Making sure your filtration returns are covered appropriately on the ponds edge is very important for good pond circulation. Pond pumps can pull around these objects and cause the water pressure to drop significantly.

    Pump Impeller is broken

    Pond pump impellers will eventually ware out. Sometimes due to water cavitation (caused by many things) or simply debris getting lodged in the pump over time. Original Content Source koipros.com – Not all filtration will capture particulate capable of eroding your pump impeller. Which is why it’s important to have different stages of filtration.

    Different Stages of Filtration

    • Skimmer Basket (to collect heavy debris)
    • Filtration Media (to collect the fine particulate)
    • Ultra Violet Light (to kill bad bacteria)

    The glued fittings have leaks.

    There are glued fittings near the suction area of the pump. Occasionally, the glue is not evenly distributed around the pipe. As a result, there will be air channels that pop up. Sometimes, when the pump is turned on, water then comes out of this opening. If the pump works as it is supposed to, air is sucked in the hole. If you do not notice any water coming out, flip the pump on and put a little water near the joint. If water moves in, there is a hole present.

    The threaded fittings have leaks.

    Does the pump have threaded fittings near the suction side? There could be a leak. As with the glued fittings, test to see if there is a problem. If there is, remove the fitting and put plumbing tape around it (about four layers). There is more help available in the “How to Glue Pool Fixtures Together” guide. Also consider if one of these fittings is closed when it should be open, sometimes these get turned off and issues arise. If you still can’t figure it out – Give us a call today (714) 613-0123

    Call to Action

    Maintaining a healthy pond doesn’t have to be complicated. If your pond pump isn’t priming or you notice other equipment issues, follow the steps in this guide to troubleshoot and fix the problem.

    Need extra help or want an expert to take a look? Contact us today and our team can guide you or provide professional pond equipment repair services.

    Reach Us:
    529 W Blueridge Ave #F110
    Orange, CA 92865
    📞 (714) 613-0123

    Conclusion

    A pond pump that won’t prime or other equipment issues can be frustrating, but most problems are fixable with careful troubleshooting. By checking water levels, inspecting seals and fittings, cleaning the impeller, and maintaining proper filtration, you can keep your pond running smoothly and your fish healthy.

    Regular maintenance and timely fixes prevent small problems from becoming costly repairs. If you’ve tried these steps and your pond equipment still isn’t working properly, don’t hesitate to contact our experts. With the right guidance, your pond can stay clean, healthy, and enjoyable year-round.

    FAQs

    Q1: Why won’t my pond pump prime?

    A: Common reasons include low water levels, air entering through a bad skimmer seal, clogged impellers, or leaks in suction fittings. Check each of these areas carefully.

    Q2: How do I clean a pond pump impeller?

    A: Turn off the pump, remove the impeller, and clear away any debris using water or a soft brush. Avoid using harsh tools that could damage it.

    Q3: How often should I check my pond equipment?

    A: Inspect your pond pump, skimmer, and filtration system at least once a month. Clean baskets, filters, and remove debris regularly to prevent issues.

    Q4: Can I fix leaks in my pond pump fittings myself?

    A: Yes. Glued fittings may need re-gluing, and threaded fittings can be sealed with plumbing tape. Make sure to test for leaks before restarting the pump.

    Q5: When should I call a professional?

    A: If you’ve tried the basic troubleshooting steps and the pump still doesn’t prime or equipment fails, it’s time to contact a pond equipment repair company.

  • How to DIY an outdoor fountain in a lake

    If you have a lake or pond on your property, adding an outdoor water fountain can bring your water feature to life. Not only can a beautiful water feature help in adding value to your property, but it can also be aesthetically speaking for yourself and guests. After all, who wants a boring pond or lake anyways right?!

    Contrary to popular belief, adding a fountain doesn’t require a whole lot and isn’t terribly difficult either. In fact, it’s quite simple to do, and no special skills are required. Here’s how:

    Step #1: Fountain container

    First thing’s first – You’ll want to measure your lake’s or pond depth. You’ll want to make sure that these measurements where you’ll want your outdoor lake fountain installation to be as well. Sometimes it’s worth having someone on shore take a picture of you to review if you do in fact want the fountain in that spot of your lake.

    With that being said, you’ll have to either take a small boat or consider a float tube, worse case swim! Maybe consider this your training since you’ll be spending most of your time here if you’re going to continue with the project.

    Step #2: Plumbing & Fittings

    One of the most crucial parts of your fountain is the piping and plumbing. Start by measuring your pump’s height with a rigid tube attached to it. Stop with the tube and cut it at your desired height. Take note that the length of your tube should be above the water level. These PVC tubes are readily available at nurseries or hardware stores. We will often lay the pipes along the shore, measure, cut, and not glue until we are 100% sure on placement and fittings. We always suggest using ASAHI Ball-Valves as these can last over 20 years, and can be removed easily.

    Step #3: Pump & Head

    When you’re installing a fountain on your lake, it’s best not to place it directly on the ground, as your equipment can become clogged with debris and other pollutants. Instead, look for a flat rock where you can securely place the pump – one that’s also big enough to make sure that it doesn’t fall over. Worse case you can always make one or consider using a floating island like such to hold simple equipment. In regards to “Head” this is the distance your pump has to pump in order to reach the fountain, you want to limit this distance as much as possible or your pump might not powerful enough to supply your fountain with water.

    When you’re purchasing a pump, make sure that the one you purchase comes with a filter or else be ready to make one. This is to make sure that the water intake is covered and that dirt and debris will not gush into your pump. If the one that you’ve purchased doesn’t have a filter, try to place a hose towards the intake and position it towards the end of the hose going to the lake floor.

    Step #4: Positioning Your Fountain

    So you think you’re ready to position your outdoor fountain and into your lake. Start by positioning your pump on the rock or island you’ve chosen. When doing so, make sure that the rigid tube is pointed up so the projection is outside the water. You can use this as is, or, alternatively, you may also purchase additional fountain attachments that are placed at the end of the tube. These attachments come with various designs and are typically easy to attach to the pipe. These will give your fountain various effects on how the water comes out.

    Step #5: Securing the Fountain

    Make sure that your fountain is secured and is placed somewhere it won’t tip over. You can secure your fountain by using a rigid netting mechanism or weighed system attached to the floor of your lake (like an anchor) If you go this route, start by cutting a hole in the center – make sure that it’s large enough so that the tube can fit. Then get stakes that are similar to size to the water’s depth. Attach stakes per each netting’s end and push it underground. Do it on both sides. Doing this will ensure that your fountain doesn’t move around and that it stays in one place.

    Step #6: Finalizing

    The last step to make sure that the fountain works is by attaching it to a power source. Don’t worry about the pump’s cord. They’re usually waterproof and submersible. However, the plug itself shouldn’t get in contact with water, so make sure that you plug it into a dry outlet. Plug your pump to an electrical outlet – and voila! You now have a working outdoor fountain by your lake. You may find yourself adjusting the pump’s flow by turning it up or down. You can also use solar power on the floating islands to charge a power-bank for your fountain.

    Final Tip

    Once the fountain is running, watch it for a few days. Adjust the pump or position if needed. Clean the filter often to keep water flowing smoothly.

    Ready to Build Your Fountain?

    You now know the steps to make your own outdoor fountain for a lake or pond. Start small, keep it simple, and enjoy the fresh look and sound it brings to your water.

    If you’re ready, grab your pump and supplies today and get started. Your lake or pond will thank you!

    Not sure where to begin? Feel free to contact us

    Contact Us:

    529 W Blueridge Ave #F110
    Orange, CA 92865

    For more tips, visitour website or Call Us

  • How To Repair A Cement Fountain

    Cement Fountain
    backyard pond and fountain maintenance, repair, and construction services for Aliso Viejo properties

    Cement fountains are always a great addition to any property. They are low maintenance, while also typically very efficient due to their small pump size, and sometimes a great alternative water feature to have the tranquility of water on the property without breaking the bank.

    Although, you’ll likely find that most fountains begin to develop fissures and cracks after a few years due to the elements like the sun and local atmospheric pressure adjustments. Additionally, If you have a decorative water fountain with a design like a gargoyle, custom tile, or unique rock installed on the fountain, some parts of it may break off, requiring custom repair from a company that understands fountain repairs. 

    The good news is, broken cement fountain repairs are usually easily accomplished by the typical DIY do-it-yourself homeowner in a short time and with little expense. After the repairs are made, you can re-seal your entire fountain with a clear sealant if you’d like. 

    If you’re good at painting, make your repaired fountain appear new with a fresh coat of non-toxic, water-friendly paint (which is also safe for Koi Fish or Turtles around your fountain). 

    Of course, you can always contact us for the help of a professional fountain contractor. We’ll make your custom fountain the centerpiece of your garden, Dr Office, or other commercial property. Fountains are a great addition to any walkway, entryway, courtyard, food court, backyard, and more. 

    Materials You’ll Need To Begin Repairs:

    • Absorbent cloth
    • Wire Brushes
    • Concrete Epoxy or Premixed Cement
    • Putty Knife
    • Plastic Trowel
    • Epoxy Mixing Plate
    • Duct Tape
    • Concrete Sealer
    • Vinegar
    • Brush

    10 Steps To Repairing Your Cement Fountain And Water Pump

    Initial Preparation

    Turn off the fountain pump. Remove the water and dry the fountain. Examine the fountain and its basin for any breaks, cracks, or holes. Surface preparation is important in repairing small cracks and larger areas of concern on your fountain.

    Cleaning the Fountain and Water Pump

    At this stage, you can also start cleaning the fountain water pump, drainage system, and water feed hose to remove debris and concrete dust. Do it with a mixture of vinegar and water.

    Add two cups of vinegar to standing water and start cleaning from the outside. Then dip the pump in the same mixture and let it run for around 30 minutes.

    Absorb water and dry the concrete fountain using a good absorbent like a towel. Let it dry completely by allowing the water to evaporate through the cracks in the concrete for at least 24 hours.

    Before you start the repair process, you’ll want to clean the area. You can use a wire brush to remove concrete dust, small particles of dirt, and any broken pieces of concrete that still remain on the cement fountain.

    Use a finer wire brush to dislodge concrete from the joints at locations where designs are created and fixed on the fountain.

    Preparing the Epoxy Mix

    At this stage, you can use concrete epoxy or a patching agent like Liquid Nails to restore the broken cement fountain surfaces. You’ll have two tubes of the epoxy to mix before you apply.

    Use a paper plate to create the mixture of hardener and a bonding agent. Use a plastic spoon to mix these differently colored ingredients on the paper plate until you achieve a consistent color.

    Cement Adhesive Option

    If you have a fountain with several tiers, you can use premixed cement from a hardware store to recreate your fountain.

    Once you’ve cleaned the fountain, repair design elements like the gargoyle, wings, and complete other cosmetic work that you need to do in order to achieve symmetry in the different elements.

    Filling in the Cracks

    You can now use the plastic spoon to fill the smooth epoxy paste mix into the cracks or broken concrete. Fill the paste into the holes until it appears above the surface level.

    Replacing Decorative Pieces

    When you’re joining two surfaces, hold the dislodged surface in one hand and apply the adhesive on one side and then the other side that is intact on the fountain before you join the two surfaces together. Create an even surface by spreading the plaster with a plastic trowel until the surfaces are leveled.

    Care must be taken to fill in enough epoxy paste to replace designs that were broken or dislodged during the repair process. The epoxy paste that you fill will be able to hold design pieces that you fix back onto the fountain once you’ve held them together for a period of at least two minutes.

    Using Duct Tape

    You can use duct tape to hold designs that are not level to the horizontal. When you’re satisfied that all the pieces are in place, wrap duct tape around the entire cement fountain to hold all the pieces together.

    Drying Phase

    Complete the repair by allowing the epoxy to dry off on the cement fountain for at least 24 hours.

    Slowly remove the duct tape.

    Applying Paint or Sealant

    Use a brush to apply a concrete sealant like Rust-Oleum paint over the entire cement fountain. The purpose of using a concrete sealer or paint is to protect the cement fountain from the ultraviolet rays of the sun and also to prevent water from penetrating the repaired surface and causing fresh cracks over a period of time.

    Completing Repairs

    Again, let the concrete sealer dry off completely for at least 24 hours before you start the flow of water to your repaired cement fountain.

    While a property owner can repair a cement fountain, it is always a good idea to seek professional help, especially when you’re struggling with some part of the repair process.

    You’ll find that it is a better and more viable option in the long run, as the professional will be able to notice cracks that need repair before they cause more damage.

    Final Thoughts

    Regular maintenance by a professional team will ensure that your fountains remain in good shape, and you’re able to get repairs done at short notice.

    We service both commercial and residential properties in California. From outdoor fountain maintenance services , fountain filtration, pumps, maintenance, and construction, to complete landscape renovations contact Koi Pros for a free quote today (714) 613-0123

  • FAQs About Water Fountain Maintenance and Installation

    pond cleaning

    There’s nothing more serene than having a water fountain, or any other sort of water feature in your yard. A lot of individuals simply love having an outdoor water feature by their garden or yard simply because it creates that calming vibe, not to mention, that it looks super good too. What a lot of people don’t enjoy, however, is maintaining their water fountain or other outdoor water features such as their koi pond. If you’re planning on having one installed, here are some of the frequently asked questions on water fountain maintenance and installation, as well as things that will make this dreadful process more bearable.

    DOES MY WATER FOUNTAIN’S LOCATION MATTER WHEN IT COMES TO MAINTENANCE?

    In a way, yes. To make sure that your water fountain doesn’t get wear and tear easily, it must be situated somewhere in your yard that doesn’t get too much foot traffic, but somewhere visible enough so you can admire it. Take note, that if you decide to install your water fountain in a dry area, you’ll find that you’ll be cleaning it more often than when it’s in an area where it gets wet.

    If you have little to no garden space, you may also opt to have a water fountain installed in your patio. Aside from the fact that it makes your patio look more aesthetically pleasing, it has also been proven to help in the absorption of noise pollution. The point is, regardless of where you’re planning on installing your water fountain, you have to make sure that it’s away from areas that could be typically knocked over either by pets, little kids or even adults.

    Another factor that needs to be taken into consideration concerning water fountain maintenance is the debris and sunlight. If you have decided to place it somewhere where tree leaves may fall, you’ll find yourself with a fountain that has more algae blooms – which means that you’ll have to clean it more often.

    Before having a water fountain installed, you can always ask the professionals for advice on where your fountain can be best placed. While the final say still depends on you, considering their advice might not just be a bad idea afterall.

    HOW DO I PROLONG MY FOUNTAIN’S LIFE?

    The life and heart of every water fountain lie on the fountain pump. With that being said, to prolong your fountain’s life, you have to take the time to make sure that your pumps are well-maintained. Unlike other types of pumps, fountain pumps are more prone to getting debris and clogs, so you must take them out of your fountain and have it regularly cleaned.

    Don’t forget to also get rid of the sand, leaves, dirt, grass and other debris that may have fallen on your fountain.

    MY FOUNTAIN IS LEAKING, WHAT SHOULD I DO?

    The first thing that you have to do is to find the leak. If your fountain base starts to leak, but no visible cracks can be found, you may want to let it sit for a week or two, until the cracks become visible. Once this happens, make sure that you keep the water 3/4 full.

    If you own stone or fiberglass water fountains, these leaks can be covered with a clear Silicone II. Look for the source of the leak and cover it up from the inside of the fountain.

    WHY DO I SEE WHITE RESIDUES ON MY FOUNTAIN?

    These white residues are commonly referred to as the white scale. This is simply caused when you have hard water, thus, the calcium build-up. Don’t worry – you can easily get rid of the calcium build-up by gently rubbing the affected area with white vinegar. Run the fountain and you’ll notice that the build-up will go away.

    You can also consider checking out different fountain care products that help keep the cleanliness of your water, thus, prevents white scales.

    HOW DO I WINTERPROOF A FOUNTAIN?

    Before winter even arrives, make sure that you are fully prepared and the first step is by making sure that water is fully drained from the fountain, followed by unplugging the fountain pump. Make sure to take it out and keep it in a heated area. Since your fountain will be exposed, make sure that you cover it up during the winter months so that snow and other falling debris won’t fall in. In general, your water fountain won’t freeze, especially if it’s made up of fiberglass. Fiberglass is usually the top choice of most individuals as they winterproof and can withstand cold weather conditions.

    Remember, drain your water fountain to make sure that the water won’t freeze. This will also prevent your fountain from contracting and expanding. If this happens, you’re most likely to notice cracks in your fountain.

    If you’re not sure how you can properly winterize your water fountain, make sure that you reach out to your fountain maintenance professionals.

    WHAT’S THE PROPER WAY OF CLEANING MY FOUNTAIN?

    Water fountain cleaning and maintenance depends on the material the fountain is made of. It can be either copper, ceramic, or stainless steel. Depending on the materials, here are some quick tips on how you can clean your fountain.

    Copper Fountains: With a soft cloth and furniture cleaning product, gently rub your fountain.

    Ceramic Fountains: Use a sponge or any soft cloth and clean it with clean and soapy water.

    Stainless Steel Fountains: With a stainless steel cleaner, gently clean the fountain with a dry cloth.

    If you’re not familiar with the fountain material, do not hesitate to seek help from outdoor fountain maintenance services.

    WHEN IS IT TIME TO HIRE PROFESSIONALS?

    You probably know by now that proper maintenance is the key to keeping your fountain looking good, and this means that you have to regularly clean the fountain. If you can’t find the time or can’t do it yourself, this might be the right time to hire a water fountain maintenance professional to help you with these kinds of tasks.

    Additionally, always call the professionals when you’ve noticed that your fountains have problems that can’t be typically fixed on your own. If you don’t have any idea about what to do or haven’t had any experience fixing water fountains, it’s best to leave it to the experts. You might do more damage than fix it if you simply do it yourself even without proper knowledge.

    HOW CAN I KEEP THE WATER IN MY FOUNTAIN CLEAN?

    Outside debris, combined with sun and pollen may result in an algae formation and bloom. How much algae grows in your outdoor fountain depends on you – on how often you clean the fountain, and on how you clean the water. There are products you can easily buy out there to keep your water clean, and one which is readily available out there is hydrogen peroxide. One tablespoon per one gallon of water is enough – and make sure that you add this twice a month. Hydrogen peroxide is an effective product that’s free from harsh chemicals.

    Avoid using chlorine-based water treatments, especially if you have a stainless steel fountain. They’re considered to be corrosive and can make your fountain’s inner connections, tubings and pump brittle. It may also cause discoloration to your fountain.

    Again, if you’re not sure about how you can clean and properly maintain your fountain, make sure that you leave it to the experts.

    IS IT POSSIBLE TO ADD KOI FISH & TURTLES TO MY FOUNTAIN?

    A lot of people who’ve opted to get water fountains add fishes in theirs. It adds a more calming and serene vibe.

    One of the most common fishes that are added to fountains is koi fishes. Just make sure that you don’t add them immediately after installation. Make sure that you give it some time to cure and for the minerals to be completely released before adding fishes. Depending on how fast the curing process is, adding fishes to your fountain in between 1 – 12 months of continuous use is ideal.

    Take into consideration that some fishes are pH-sensitive. If you’re unsure, always consult a vet before adding fishes to your water fountain.

  • 17 Outdoor Brick Fountain Ideas for Every Space

    Outdoor Water Fountain

    Tricky waterfalls, recycled watering cans, and captivating outdoor fountains. These 17 outdoor water features will provide an idyllic ambience right in your backyard, commercial courtyard, food court, and more. From small ponds and recycled plastics to luxurious stones, the possibilities with water features are endless and can be built to suit every outdoor space. 

    We often receive questions like – What is the typical cost for custom landscape design, including a fountain? What do you suggest we go with – Pondless Fountain? Maybe a Tiered Fountain? Wet-wall fountain? What if we have kids or animals? Help!? 

    That’s why we decided to write this article and wanted to cover everything related to outdoor brick fountain ideas. For the skilled do-it-yourselfer, many water fountain projects make great DIY projects, which will be outlined below. In addition to this, we will also give you some great water features and landscaping ideas in case you want to hire a professional fountain design and construction service for your next big project. 

    Are you trying to cover up that late-night highway noise, or maybe that loud dog down the street who seems to bark at everything? Possibly considering a backyard fountain offering soothing and relaxing noises for your Yoga sessions?

    Our wet-wall and custom fountain ideas outlined below will be helpful in establishing a solid plan of attack for creating a stunning focal point in your residential and commercial entryways, and front yards, or for enjoying when kicking back on your backyard patio, under a beautiful cedar-wood pergola we installed.

    A Moorish-Style Wall Fountain Completed with Tiles

    A stunning backdrop will enhance a water wall in any style. This area is covered with hand-painted Mexican tile and glazed tiles of the Moorish style. The water flows gently to a semicircular pool topped by cobalt and yellow mosaic tiles. Bring an additional flair to your wall fountain using a beautiful accent piece, such as a sunflower positioned on your tiles. This can be the focal point of your water feature in the yard. Come up with outdoor brick fountain ideas for a small pool with one lower basin or even two basins.

    Caterina Tiered Fountain

    A Caterina tiered fountain is an impressive two-tiered outdoor water fountain with a traditional tier. This 52-meter-high pedestal waterfall will make the perfect focal point of your formal landscape in an outdoor space. Stream water flowing from the acorn-shaped finial splashes into an encircled basin and flows slowly over the edge toward the bottom basin. The outdoor fountain basin is just 3 feet tall and features Tuscan motifs that are ideal in both modern and traditional waterfall gardens. You can choose 14 finished outdoor fountain surfaces hand painted with natural and weather-tolerant colors for any garden.

    Tiered Water Fountain

    This outdoor fountain has two sides that are ideal for the front yard or for the garden. Come up with some fountain ideas with clean lines. Start with the garden fountain in your backyard pond. DIY scale: If you use a set of containers and hoses to add character to a tiered water fountain in your backyard, you’ll have the perfect solution for a garden fountain with running water. It will make this into a simple and fun water wall DIY project. Depending on the design of the outdoor fountain in your backyard, you may need professional help with additional fountain ideas. Pricing: A low-quality outdoor fountain can cost around $1,100, and a high-quality outdoor fountain is priced at around $7,500 for excellent design and installation. Outdoor space landscape advice: Brighten your cascade-dwelling waterfalls with bright flowers on the edge of the water feature. The vibrant flowers become the focal point of a garden pool with running water.

    Japanese-Influenced Fountain like A Concrete Zen Garden

    Fountains can be added to the landscape in different ways. The Japanese-inspired outdoor fountain is a perfect complement to the stone-framed lake. The sheets of water on the edge of this water feature capture the sun and provide calming sound. The water spouts out from the surface of the stone and then flows out of the water to the pond or basin at the bottom.

    Small Fountains Can Have a Big Impact On A Property

    Fountains can be used in many different landscape types and sizes. Running water on a water wall sounds calm and provides visual enjoyment to guests. Blue-painted bricks form round patterns around the pillars of the garden fountain that make blue-gray water a focal point. Cool colors complement nicely the flowering trees that surround the water feature. You can always add several such small fountains in front of the patio for your guests.

    Navonna Outdoor Water Fountain

    Its large splash pool and lower height make it the most elegant centerpiece of the garden and patio. An elegant one-piece basin has an oval base surrounded by a decorative panel in Classical Italian fashion. This outdoor fountain basin is topped with bubbling pipes, and four straight pipes create dramatic flowing, splashing water that runs from each side of the swimming fountain. Unlike ornamentation, this water feature provides the ideal way to create a Mediterranean feel to your landscape. This fountain has 14 hand-painted finishes for modern and rustic designs and is made of cast concrete.

    Japanese Outdoor Brick Fountain Ideas

    Shishi-odoshi refers to a Japanese device aimed at scaring deer and other animals from the farming zone. A szu is the style in Japan of a water fountain that helps repel the annoying (and dangerous) intruder in their area. The curved tube of the outdoor fountain can be tilted at the balance. It’s the heavier end that falls against rocks, while the lighter end points upwards as it absorbs water. As light accumulates, water bamboo sticks swivel downwards and spill water into the basin of the garden fountain. When the water is removed, it returns its heavier side to its equilibrium. When the balance is restored, the heavy side hits pebbles and emits a sound. This sound scares the animals.

    Provincial Outdoor Wall Fountain

    It can be interesting to design your landscape in a French provincial style. This shabby chic provincial outdoor fountain is a great addition that will transform your garden into your dreamy, classy oasis. This water fountain will be the center of attraction. Bring this tall wall fountain to life with sound as the waters splash against pots and other materials you place around the fountain. Every beautifully cut edge adds an elegant finish — the bottom pool is decorated beautifully with materials that provide character to the fountain.

    Meditation Garden Glazed Pot With Bamboo Spigot

    A meditation garden glazed fountain is a perfect match for your landscape. A large and glazed oval pot makes this the perfect addition to meditation gardens. The sound of flowing water creates a peaceful atmosphere, and the bamboo spigot enhances its decor. Surrounded by lush greens is the pipe that runs the water, which enhances its aesthetics. You can always add more life to your water feature with additional fountain ideas, like adding a tall fountain in your yard or in front of the patio for your guests to rest.

    Asian-Style Pedestal-Like Water Fountain

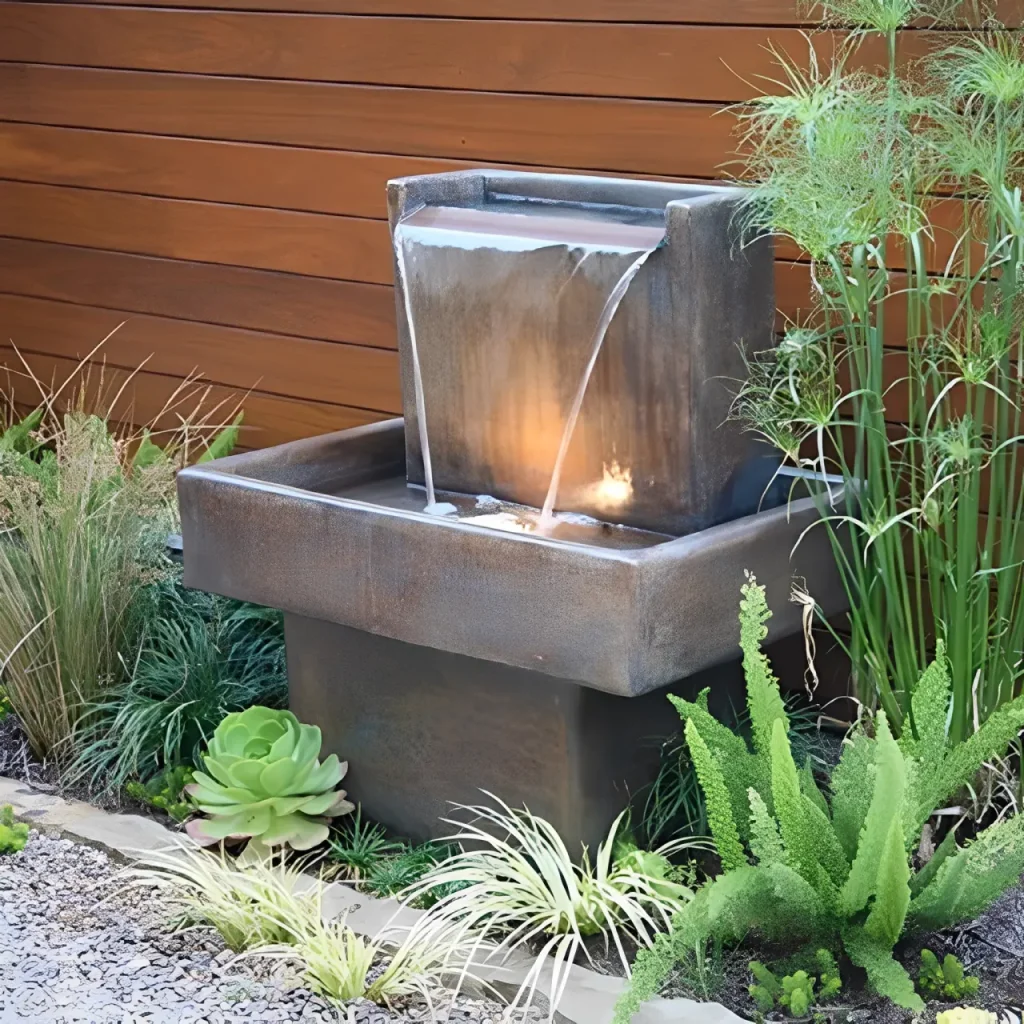
    An Asian-themed pedestal fountain gives an elegant look to your landscape. The pedestal-like fountain is a square-shaped fountain with an air bubble nozzle. The concrete outdoor fountain is durable and provides a wonderful focal piece for a garden or yard in any outdoor space. This water fountain has Asian influences and has been designed for a pedestal fountain theme.

    Large Vizcaya Wall Fountain

    The huge Vizcaya water fountain is a perfect example of beauty. The dark glazing adds a sophisticated look which is sure to resonate with a garden or a large yard. The unique design of this waterfall fountain combines beautiful 3-tiered fountain water that dries smoothly into the bottom area into a basin. This large back plate reflects the history and art of Rome and the magnificent sculptures that surround it. The older components in this water fountain provide depth and character to the overall appearance and feel of this outdoor fountain, making it the perfect addition to the yard or landscape. Skilled artisans work on these outdoor water fountains to provide quality, beauty and durability to the landscape.

    Modern Carved Cast Stone Fountain

    A tall fountain is sometimes perfect for an informal garden. Here, this recirculating fountain has carved cast stone and neat lines and natural forms. The river flows from the bottom up the ridge, then again to its bottom into a basin. This simple water element creates an elegant setting which accentuates running water sounds over river rocks. It’s the perfect addition to any landscape. Reduce the depth of water in the basins to create a stronger tone or increase the volume.

    Crafts Water Features Like Hanging Fountains

    Decorative fountains provide the best solution to any problem with spaces. It hangs just like the pictures on the walls. A simple water feature can add a soothing scent to water trickles that a picture cannot provide. This craft water feature perfectly matches the traditional setting. Ivy surrounding the emerald and growing plants make this water fountain a focal point on walls.

    Pondless Waterfall

    A few times, your own backyard can’t get enough space for even a garden pond. Waterfalls in ponds can offer the same artistic appeal, and the soothing sound of water trickles. A lake-less waterfall does not have a pool or basin to hold water. The fountain absorbs water for reuse. If this water fountain DIY is too difficult for you, please consult a landscaping professional. Pondless fountains usually start at around $4,500. The price increase depends on the features, its size, and other additions to this water fountain. You can create this beautiful focal point in a small yard with the right water pump creating a relaxing atmosphere around your beautiful fountain with water bubbles, water pours, and water cascades in mid-air.

    Urn Fountain

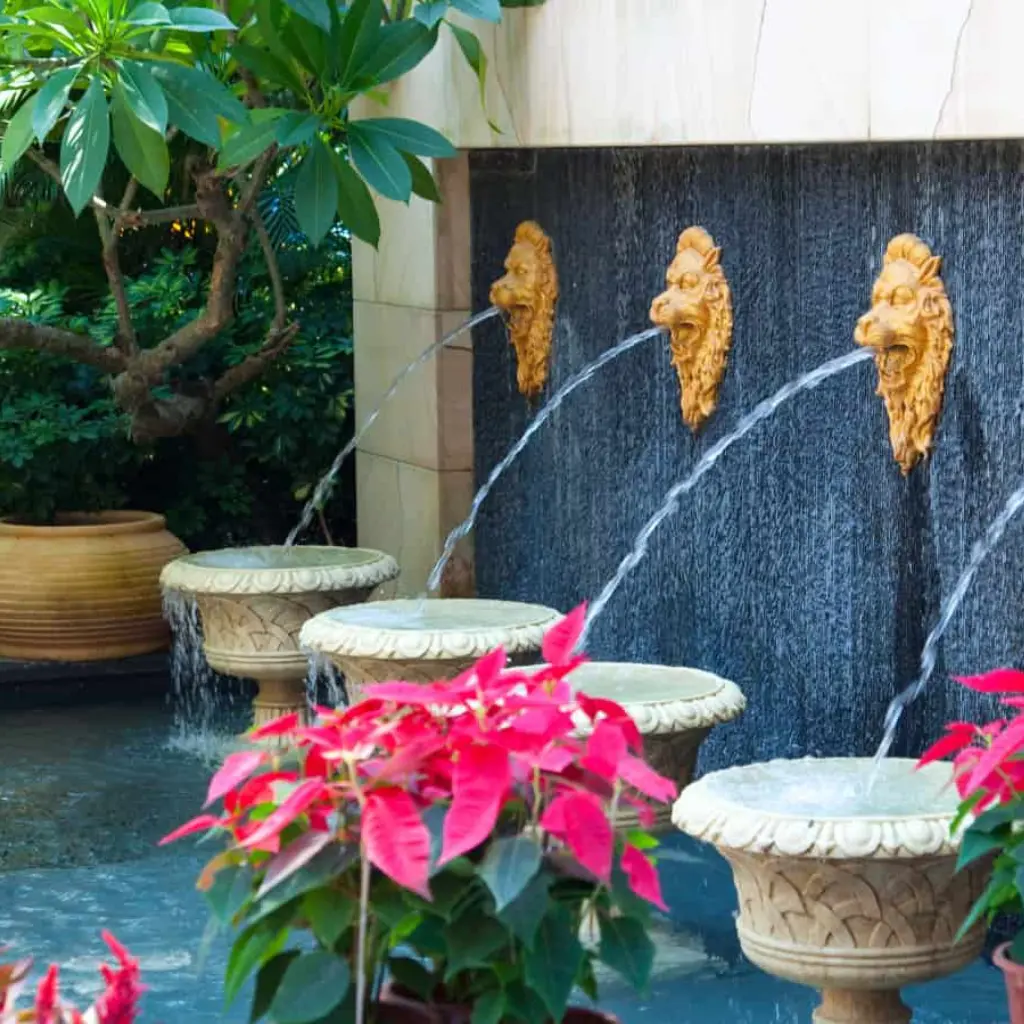
    An urn fountain is an easy and effective way to display a collection of containers. Curved edges of the urn add a soothing texture, and their varying height is attractive to the eyes. DIY metering: When you have selected your favorite vases or urns, either get an expert to install your fountain for you or wear a DIY cap for a moderate-level project. Cost: Price depends on the size of the urns and the quality of the urns you choose for your project. The water fountain is usually cheaper in some cases than $200, while other urn prices could go to as much as $1,000 or more.

    Stone Waterfall

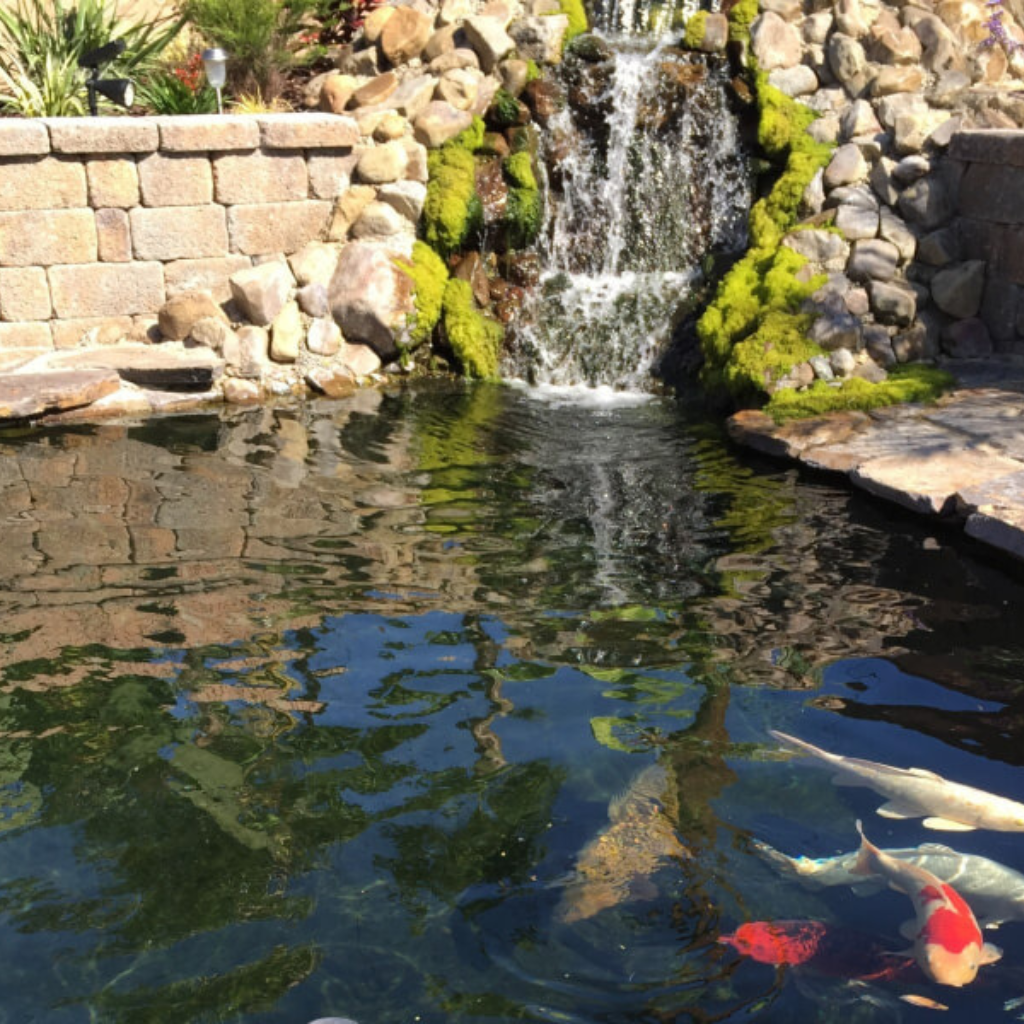
    A natural stone waterfall can bring nature into your backyard. DIY Scale: It can be either simple or hard, depending on how large your project’s waterfalls are. This water feature installation usually costs around $3,000 to $4,000. Materials for a DIY stone waterfall would be around $1,000. Water feature landscape tips: Brighten your garden pool by planting bright perennial and annual trees along the border.

    Landscape Lights

    Unless you’re sleeping in the sun, you can never lose the waterway. Install landscape lighting for ponds, waterfalls or any water feature to make it the focal point. You will enjoy the glow of the sparkling lights that cascade into the swollen water. DIY scale: For lighting to enhance the water fountain, we suggest hiring a professional. Lighting a water feature with solar, pathway or LED lighting is a straightforward DIY activity. Landscape lighting costs vary based on light type, project size or whether you are working with an expert.

    Conclusion

    Outdoor fountains and water features aren’t just decorative additions — they bring movement, sound, and serenity to any space. From tiered fountains and Japanese-inspired designs to modern cast stone and pondless waterfalls, the options are endless. Whether you’re aiming for a small DIY project or planning a custom-built feature with professional help, there’s a water feature that can fit your style, budget, and space. With the right choice, your backyard, courtyard, or commercial property can become a peaceful retreat that feels welcoming and timeless.

    Call to Action

    Ready to transform your outdoor space? Explore your favorite fountain ideas and decide whether a DIY approach or professional installation is the right fit for you. If you’re considering a custom outdoor fountain or need expert guidance, reach out to a professional landscape and fountain design service today. call KoiPros today. Create the soothing oasis you’ve always dreamed of your perfect water feature is just one decision away.


  • How to Dechlorinate Pond Water

    Pond Maintenance Services

    Chlorine is used to purify our drinking water and keep it safe; however, chlorine can cause numerous issues to your aquatic animals and can harm your fish and plant life.

    Chlorine is used to control harmful bacteria growth in our water. If left untreated, the bacteria could make us sick. The chlorine found in tap water is not harmful to us because only a low amount of chlorine is used. The chlorine found in our tap water can be removed by allowing the water to stand overnight or by boiling the tap water. In nature, chlorine is a gas; therefore, the chlorine found in tap water will evaporate over time or when the tap water is boiled.

    Although chlorine is unlikely to harm us, it can cause problems with animals such as koi or goldfish that are more sensitive to the chemicals. In fact, chlorine is toxic to most aquatic life and can cause stress and nasty burns on your pond fish as it enters their gills. Heavily chlorinated water should always be treated before it is used in ponds with fish, especially if a large water change is being performed. We advise any Koi and turtle pond owners to make sure they have a bottle of “dechlorinator” or “dechlor” by their pond in case of any pond emergencies. If you need an emergency pond service call us at (714) 613-0123 today

    You can remove chlorine and its derivatives from your tap water using several methods, including activated carbon, a dedicated filtration unit, or de-chlorinator treatments. Each of these options removes chlorine and makes the water safe for koi, goldfish, and the rest of your pond’s ecosystem.

    Chlorine and Chloramine – What Is the Difference?

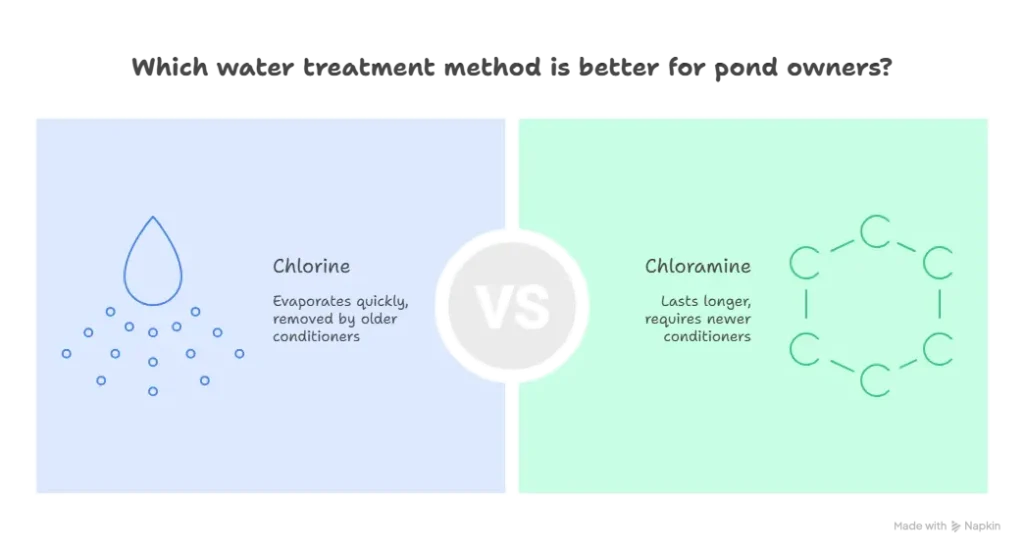
    Water companies can use chloramine or chlorine to sanitize tap water. Both of these chemicals should be removed before you add tap water to your pond. In the past, chlorine was used to disinfect tap water; however, recently, a new substance has been developed called chloramine, which is a mixture of both chlorine and ammonia. This mixture lasts longer than chlorine and does not evaporate into the atmosphere. This is good news for water companies because they can efficiently treat tap water, and the tap water will remain disinfected for a longer period of time. Unfortunately, this is bad news for pond owners because they can no longer allow tap water to stand and remove the chemicals. Furthermore, older water conditioners can only remove chlorine. The chloramine would remain in the tap water.

    What Is the Solution?

    You must make sure that your de-chlorinator treatment neutralizes both chloramine and chlorine. Newer water conditioners remove both of these substances. If you are unsure which chemical is used to disinfect your water, opt for a dual treatment. You can also double-check by contacting your local water treatment company and asking which chemicals are used during the treatment process. Some states and counties continue to use chlorine, while others have begun to use chloramine. The only way you can know for sure is to ask your water treatment company.

    Why Is Chlorine Dangerous to Fish and Ponds?

    Chlorine and chloramine can be deadly to aquatic life. It can cause stress, burns, or even death.

    Chloramine and chlorine are reactive substances that bind and react to organic compounds. A sufficient dose of chlorine is a powerful disinfectant, which is why it is used around the world in tap water to destroy bacteria. The problem with chlorine is that it cannot distinguish between good and bad bacteria and will, therefore, kill off all types of bacteria in your pond and filter box. Beneficial bacteria are essential to your pond’s biological filtration system and will be destroyed by chlorine. This would cause the water quality to decrease and allow waste products to increase.

    Chloramine and chlorine are toxic to aquatic life. Even a trace amount of these chemicals can cause stress and damage to your fish. Upon contact, the chlorine will burn and damage the scales, gills, and breathing tissues of koi and goldfish. It can also enter the bloodstream and cause internal burning and significant pain to the fish.

    How Do You Measure Chlorine? What Are the Ideal Water Values for Your Pond?

    The ideal amount of chloramine and chlorine in a pond should be 0.00 ppm or as close to zero as possible. Chlorine offers no benefit to a pond. It will kill off beneficial bacteria in the pond and stress, injure, or kill your fish; therefore, all traces of chlorine or chloramine should be removed from your pond water. It may be impossible to remove all the chlorine or chloramine; hence, a reasonable goal for a pond with fish is to have around 0.01 PPM in your pond. If your climate is hot and has a lot of natural evaporation, you will need the top off your pond water often, which means you need to be more careful about the chlorine levels in your pond water compared to someone who lives in a colder climate. Original content source: koipros.com – New ponds and those that require frequent water changes can experience high levels of chlorine or chloramine due to the amount of tap water added to the pond.

    To measure chlorine levels in a pond, you will need an electronic testing device, or you can test your water for ammonia. If there is a trace amount of ammonia present in your tap water, you very likely have chloramine in your tap water. The alternative is to assume both chloramine and chlorine are present in your tap water and treat your tap water before you add it to your pond. Your tap water will always contain at least one of these chemicals. There are commercial treatments available that remove both substances, which would eliminate the need for testing.

    How to Dechlorinate Pond Water

    1. Allow water to stand for 24 to 48 hours. This method is recommended for smaller ponds that contain fish and will only work with tap water that contains chlorine.

    If you have a small pond and need to add a small amount of water or do a small water change, allow your water to stand in a bucket for at least 24 hours. This method allows the chlorine to reach the water surface and escape into the atmosphere. Because this method requires no further treatments, it is an excellent choice for small ponds with fish that do not have a large volume of water that needs to be topped off.

    Unfortunately, this method only disperses chlorine. Chloramine is much heavier and cannot be removed using this method. If you have tested your water and it contains ammonia or you have contacted your water company and ascertained your tap water contains chloramine, you will need a dedicated treatment option like the ones listed below.

    2. Water Conditioner and De-Chlorinator Products – These products are recommended for small ponds that contain fish.

    Pond Primes Treatment removes chloramine, ammonia, nitrate, and chlorine from your tap water. A second option is a water conditioner that strips chloramine, chlorine, and other heavy substances from your water. Water conditioners are good options for both small and large ponds. The water may be treated multiple times until the desired chlorine levels are reached. Water conditioners are perfect for new ponds consisting of tap water. It can also be used with every water change to neutralize all harmful chemicals before they can harm the ecosystem of the pond.

    Although most newer water conditioners neutralize chloramine and chlorine, you should always read the label first to ensure that the water conditioner removes both types of chemicals. Modern water conditioners can be used to treat water before it is added to the pond, or it can be directly added to your pond. This provides you with a flexible choice if you already have water in your pond, and you’re worried that you still have trace amounts of chlorine or chloramine in your pond water.

    We recommend either choosing API Pond Prime’s Chlorine and Heavy Metal Neutralizer or Pond Prime’s Chlorine or Chloramine Remover. The API Pond treatment removes heavy metals, including lead and zinc. Conversely, Pond Prime removes excess ammonia and nitrates from your pond water. If you are only concerned about chlorine and chloramine, either treatment works well, and you cannot go wrong.

    3. Activated Carbon Charcoal Filtration – This choice is recommended for small and large ponds that contain fish. Activated carbon neutralizes organic pollutants that regular filter media does not remove.

    Activated carbon removes heavy organic pollutants that biofiltration and mechanical filtration cannot remove. The carbon works through adsorption. Adsorption causes pollutants to stick together and then adhere to the carbon. The pollutants are neutralized using this method. The activated carbon should be replaced every two to three months as it becomes saturated with pollutants. The contaminants that can be removed using this process include pesticides, medicines, chlorine, chloramines, perfume, and tannins.

    Activated carbon enhances clarity as it removes chlorine and chloramine from your pond during a water change. Because activated carbon is cheap, many pond owners choose to keep activated carbon in their filter box to improve water quality and remove all residue pollutants. Activated carbon can be used year-round to improve filtration and has no drawback other than the cost.

    You can treat water before it is added to the pond with activated carbon, or you can add carbon to your filter box, and the water will cycle the water through the filter box and neutralize the chlorine. This is especially beneficial for new ponds during their cycling as it will naturally bring down chlorine levels, and it improves bacterial populations allowing you to add fish safely.

    You can find out more about activated carbon by reading our article located here.

    4. Carbon Filter Hose Attachments – Carbon filter hose attachments are perfect for small and large ponds that contain fish.

    Carbon filter hose attachments are convenient for pond owners who regularly do water changes.

    An interesting method that can be used to reduce chloramine and chlorine from your tap water is to add a carbon filter to the end of your garden hose. Typically, most refills and water changes are done using a hose; therefore, adding a carbon filter can ensure chlorine and chloramine are removed from the water before it’s added to your pond. These filter attachments have become popular for gardening ponds and drinking water. Unfortunately, they cannot effectively filter tap water for a pond. Most filter cartridges run out within a few hundred gallons. If you have a larger pond, you would be replacing the filter constantly.

    Newer models of filter attachments provide a more substantial capacity (up to 5,000 gallons), meaning they are much more suited for larger ponds and frequent water changes. The filter attachment is fitted to the end of your water hose and contains an activated carbon filter chamber. As the water passes through the chamber of the filter, the carbon will neutralize chloramine and chlorine in the same manner that activated carbon does. The benefit of this method offers is that it allows you to instantly add de-chlorinated water to your pond without treating the water beforehand or after it’s added to the pond.

    If you are interested in trying a carbon filter attachment, ensure that you choose one that has a larger carbon capacity; otherwise, you will be replacing it frequently. Common carbon filter attachments are intended for only small amounts of water, and you will need something more substantial for your pond. We recommend the Ideal H2O Inline Carbon Filter. The filter lifespan on this carbon filter attachment is 8,000 gallons of water, making it the perfect choice for small and large ponds.

    5. De-Chlorination And Water Filtration Systems – This type of system is the preferred method for large, heavily stocked ponds. A dedicated water filtration system removes chlorine and chloramine.

    Although this system is not the best choice for all pond owners, those who have a heavily stocked fish pond or those who perform water changes regularly may wish to invest in a dedicated de-chlorinator system. This powerful system is used industrially to remove chlorine, sediment, and chloramine from large volumes of water quickly. The system uses activated carbon, however, on a much larger scale than carbon filter attachments. The carbon in the system is more refined to ensure a higher degree of purity to maximize water filtration. Most systems have a carbon treatment lifetime of approximately 50,000 gallons, which means it would work for many years without needing to be replaced.

    This system may be a bit of an overkill for smaller ponds; however, it is a viable option for a larger pond that requires regular water changes such as a pond used by fish breeders or fish sellers. These systems can be connected to a UV clarifier to enhance purification and increase the number of bacteria, tannins, and algae that are removed making your water clear and cleaner.

    REACH US
    529 W Blueridge Ave #F110 Orange, CA 92865
    (714) 613-0123
    [email protected]

    Conclusion

    Keeping your pond free from chlorine and chloramine isn’t just about clean water — it’s about protecting the health of your koi, goldfish, turtles, and plants. Even trace amounts of these chemicals can cause stress, burns, or worse, for your aquatic life. Luckily, with the right methods like dechlorinators, activated carbon, or dedicated filtration systems, you can create a safe and thriving environment for your pond. The key is consistency: always test, treat, and monitor your water. When you do, your pond will reward you with crystal-clear water and healthy, active fish.

    Call to Action

    Don’t let chlorine ruin your pond’s ecosystem! Start using the right dichlorination method today and keep your fish safe. If you’re in need of expert pond help or an emergency service, call KoiPros at (714) 613-0123 — we’re here to make sure your pond stays healthy and beautiful.

  • How to Clean Green Water in Your Pond

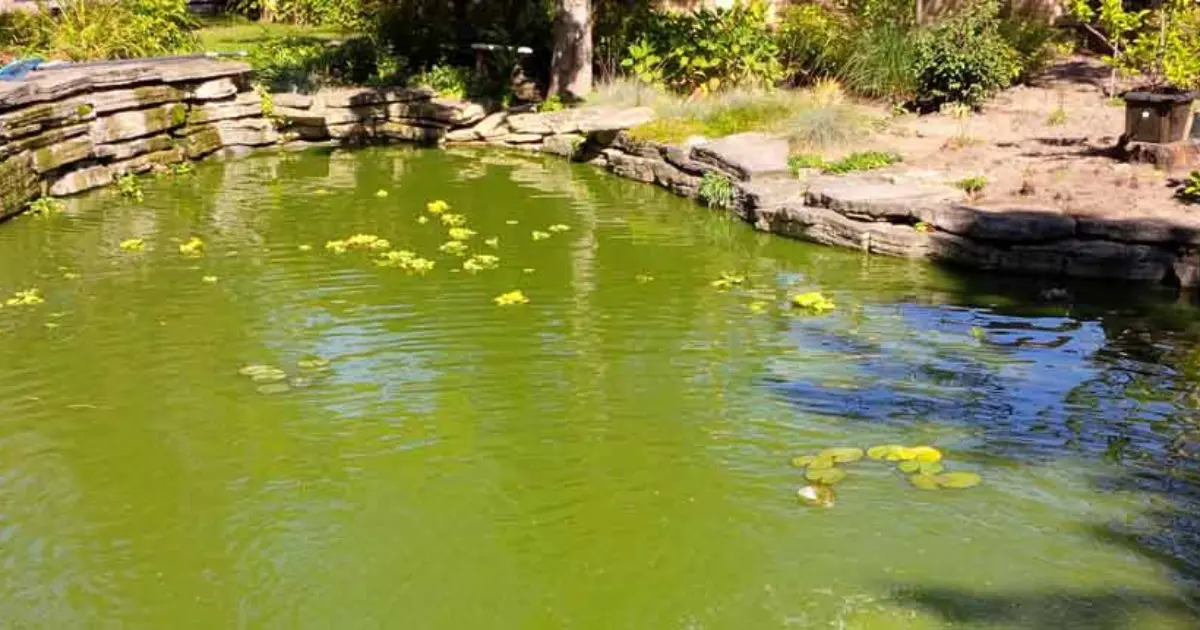
    Green water can turn your backyard pond from a serene retreat into a cloudy mess. If you live in Southern California, where warm temperatures and abundant sunlight are common, you?ve likely seen your koi pond or water feature lose its clarity. This murky haze, caused by single-celled algae, hides your fish and disrupts your pond?s beauty. The good news? You can restore clarity with practical, sustainable methods tailored to Southern California?s climate. By the end of this guide, you?ll know how to:

    • Identify the causes of green water pond solutions in your region.
    • Apply eco-friendly techniques to clear algae blooms.
    • Maintain a healthy pond ecosystem for koi and plants.
    • Use seasonal strategies to prevent green water year-round.
    • Manage nutrients and filtration for lasting clarity.

    Causes of Green Water in Ponds

    Single-celled algae cause green water, creating a cloudy haze that obscures your pond. These tiny plants thrive on nutrients, sunlight, and warm water. In Southern California, where sunny days dominate in places like Orange County and Los Angeles, algae blooms are frequent. Nutrients come from fish waste, uneaten food, and organic debris like leaves or grass clippings. For example, a homeowner in Irvine noticed their pond turned green after leaves from a nearby tree fell in during fall.

    Overfeeding fish adds excess nutrients. Uneaten food decomposes, releasing nitrogen and phosphates that fuel algae. Poor water circulation, often from clogged filters or weak pumps, lets algae multiply unchecked. In San Diego?s warm climate, water temperatures above 50?F speed up algae growth. Unlike string algae, which forms visible mats on rocks, single-celled algae stay suspended, requiring specific filtration. A Riverside County pond with low circulation saw rapid blooms until the owner upgraded their pump. Understanding these factors is key to effective pond green water treatment.

    Sustainable Methods to Combat Green Water

    You can clear green water without harsh chemicals. Sustainable methods create a balanced pond ecosystem while addressing algae naturally. Here are key approaches:

    • Beneficial Bacteria Treatments: These break down nutrients like fish waste and decaying plants. In a Santa Ana pond, bacteria cleared green water in two weeks without harming fish.
    • Aquatic Plants: Plants like water lilies, anacharis, and water hyacinth absorb nitrogen and phosphates, starving algae. For example, a Los Angeles homeowner reduced algae by adding water lettuce. Aim for one bunch of oxygenating plants (e.g., hornwort) per two square feet of pond surface, tied to rocks or in containers.
    • Shade Structures: Pergolas or floating plants like lotus cut sunlight, a major algae trigger. An Irvine pond stayed clear after adding a trellis with climbing vines.
    • Plant Filters: A small channel lined with pea gravel and plants like watercress filters water slowly. Gravel traps debris, and plants absorb nutrients, supporting eco-friendly pond water solutions.

    These natural solutions for green water are safe for koi and environmentally friendly. In Southern California?s sunny climate, combining plants and shade is especially effective. For instance, a pond in Anaheim saw reduced algae after installing a plant filter with water hyacinth. These chemical-free green water solutions keep your pond vibrant and healthy. Learn more about sustainable pond care to maintain a thriving ecosystem.
    Visual: Aquatic plant diagram 

    Filtration Systems and UV Clarifiers

    Filtration systems are vital for pond filtration for green water. Here?s how they work:

    • Mechanical Filtration: Removes debris like leaves or twigs. Skimmer nets and pond vacuums, used in San Bernardino County, keep ponds clean. An Anaheim homeowner cleared debris weekly to prevent algae spikes.
    • Biological Filtration: Uses beneficial bacteria to break down organic matter. Bacteria live on filter media like lava rock or plastic wheels. A clogged filter in a Riverside pond caused green water until cleaned and upgraded.
    • UV Clarifiers: Expose single-celled algae to ultraviolet light, stopping reproduction. Dead algae clump, making them easy to filter. A San Diego koi pond regained clarity in days with a UV clarifier.

    Water flows into the clarifier, passes the UV bulb, and exits through a mechanical or biological filter, ensuring clear pond water techniques. Combining these systems is ideal for koi pond green water management, especially for large water features in hotels or municipal parks. For example, a Los Angeles hotel pond stayed clear after installing a custom filtration system with a UV clarifier.
    Koi Health and Pond Ecosystem Balance

    A balanced pond ecosystem keeps koi healthy and water clear. Here are key practices:

    • Proper Feeding: Feed high-quality koi food, offering only what fish eat in three to five minutes, once daily in spring, summer, and fall (above 50?F). Overfeeding in Orange County?s warm climate fuels algae. An Irvine homeowner saw clearer water after adjusting feeding.
    • Water Testing: Use kits like TetraPond to check pH, phosphates, and nitrogen monthly. Low pH or high phosphates stress koi, causing health issues. Regular testing prevents imbalances.
    • Mosquito Control: Clear water and aeration reduce mosquito breeding, a concern in Los Angeles. Fountain pumps boost oxygen, supporting koi and deterring pests.

    These healthy pond water tips ensure fish health management. For instance, a Santa Ana pond owner reduced algae and mosquito larvae by testing water and adding an aerator, creating a thriving environment for koi.

    Seasonal Pond Maintenance Strategies

    Southern California?s climate requires tailored seasonal pond water care to maintain backyard pond water clarity. Here?s a seasonal breakdown:

    • Spring: Test water quality. Add oxygenating plants like anacharis. A Santa Ana homeowner added hornwort in March, cutting summer algae risks.
    • Summer: Monitor aeration in Irvine?s heat. Clean filters monthly and skim debris weekly to prevent nutrient spikes.
    • Fall: Skim leaves in San Diego?s windy season. Clean filters to prepare for winter.
    • Winter: Feed minimally, as koi metabolism slows below 50?F. Remove debris to avoid nutrient buildup.

    Aeration systems, like submersible pumps or fountains, improve circulation, preventing algae blooms. A Riverside County HOA reduced green water with an aerator. Regular pond cleaning for green water, like backwashing filters, keeps systems efficient.

    SeasonTasksBenefits
    SpringTest water, add plantsReduces nutrients, prevents algae
    SummerMonitor aeration, clean filtersPrevents stagnation, maintains clarity
    FallSkim leaves, clean filtersPrepares pond for winter, cuts nutrients
    WinterMinimal feeding, remove debrisAvoids nutrient spikes, protects koi

    This table summarizes key tasks for year-round clarity, ideal for homeowners or HOAs managing ponds in Southern California.

    Managing Nutrients and Algae Blooms

    Nutrient control is key to controlling pond algae blooms. The nitrogen cycle converts fish waste (ammonia) into nitrites and nitrates, which algae use as food. Here?s how to manage nutrients:

    • Monitor Feeding: Avoid overfeeding to limit ammonia. Feed only what koi eat in three minutes.
    • Test Water: Check phosphates and nitrates monthly. High levels fuel algae.
    • Control Debris: Skim leaves and avoid phosphate-rich gravel (e.g., yellow or white varieties). In San Bernardino County, mulch runoff triggered blooms until rock barriers were added.
    • Shoreline Restoration: Use native plants or rock armoring to reduce erosion. An Orange County park stabilized its pond edges with grasses, cutting algae growth.

    These nutrient management strategies support pond water quality maintenance. For example, a Los Angeles pond owner reduced blooms by skimming debris and testing water regularly, ensuring a healthy ecosystem.

    Why Pick Koi Pros Pond Services? Your Trusted Partner

    With over 40 years of experience, Koi Pros delivers clear, healthy ponds across Southern California. Our licensed technicians use advanced filtration and sustainable algae control, tailored to the region?s climate. Aurore Annick in Irvine transformed her murky pond into a vibrant koi habitat with our plant filtration and UV clarifier systems. Serving HOAs, hotels, and parks in Orange County and Los Angeles, we offer personalized Orange County pond maintenance and Southern California koi pond care. Our proven expertise in professional pond cleaning services ensures lasting results you can trust.

    Frequently Asked Questions About Green Water

    What causes green water in my pond?

    Single-celled algae grow due to nutrients, sunlight, and warm temperatures. Filtration and nutrient control prevent blooms.

    How can I prevent algae blooms in Southern California?

    Use plants, UV clarifiers, and aeration. Monthly testing ensures clearing green pond water.

    Are UV clarifiers safe for koi?

    Yes, they target algae without harming fish when installed correctly.

    How often should I test my pond water?

    Test monthly for pH, phosphates, and nitrogen to maintain balance.

    Can plants alone clear green water?

    Plants help but work best with filtration and bacteria treatments.

    What maintenance prevents green water?

    Regular filter cleaning, aeration, and plant management keep water clear.

    What are sustainable algae control options?

    Beneficial bacteria, plants, and shade structures offer eco-friendly solutions.

    How do I prevent mosquito breeding in my pond?

    Aeration and clear water reduce mosquito larvae in Los Angeles or Irvine ponds.

    Conclusion

    Green water doesn?t have to ruin your pond?s beauty. Sustainable methods like beneficial bacteria and aquatic plants reduce algae naturally. Advanced filtration, including UV clarifiers, ensures clarity. Proper koi care, seasonal maintenance, and nutrient control create a thriving ecosystem. In Southern California?s sunny climate, these steps are essential. Aurore Annick in Irvine restored her cloudy pond with plant filtration and aeration, creating a stunning feature. With 40 years of experience, Koi Pros helps homeowners, HOAs, and hotels in Orange County and Los Angeles maintain vibrant ponds. Contact Koi Pros at (714) 500-7381 to restore your pond today.

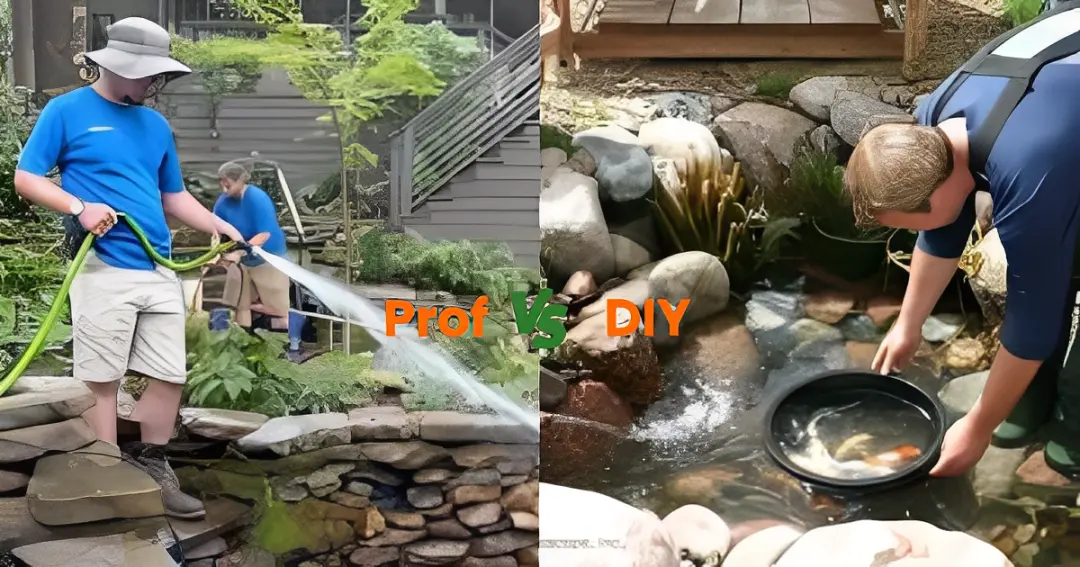
  • DIY Pond Cleaning vs Hiring a Professional

    DIY Pond Cleaning vs Hiring a Professional
    DIY Pond Cleaning vs Hiring a Professional

    Backyard ponds create a peaceful retreat in any outdoor space. Their gentle water sounds and colorful fish add beauty to homes across Southern California. Yet, the regions warm, dry climate brings unique challenges. High temperatures speed up algae growth. Low rainfall affects water levels. Owners often face a choice: clean the pond themselves or hire experts. Each path has distinct benefits and drawbacks. This guide examines both options in detail, covering methods, costs, and key factors like fish safety and local conditions. By exploring these, you can decide what works best for your ponds needs.

    Heres what this guide will help you understand:

    • Benefits and challenges of cleaning your pond yourself versus hiring professionals.
    • How Southern Californias climate affects pond care.
    • Costs, time, and risks involved in both approaches.
    • Practical tips for maintaining koi health and eco-friendly practices.
    • Seasonal strategies to keep your pond vibrant year-round.

    Why Pond Cleaning Matters in Southern California

    Ponds need regular care to stay healthy and attractive. Without it, debris builds up, water turns cloudy, and fish suffer. In Southern California, the climate makes this even more critical. High temperatures, often exceeding 80F, boost algae growth. Droughts and water restrictions limit refilling options. Over 60% of Orange County ponds face algae issues due to heat.

    Cleaning removes leaves, sludge, and excess nutrients that harm water quality. It also supports beneficial bacteria treatments that break down waste naturally. A clean pond enhances curb appeal for affluent homeowners and HOAs. It prevents mosquito breeding, a concern in humid areas like San Diego. Regular maintenance extends the life of pond equipment maintenance items like pumps and filters, saving money over time.

    For example, a neglected koi pond in Irvine developed green water and fish stress within months. Routine cleaning could have prevented this. By addressing these issues early, you maintain a balanced pond ecosystem balance and avoid costly repairs.

    DIY Pond Cleaning: Benefits and Challenges

    DIY pond maintenance appeals to hands-on owners with smaller ponds. It offers control and savings but comes with hurdles. Understanding both helps you weigh your options.

    Benefits of DIY Cleaning

    Cleaning your pond yourself can save money. BasicDIY pond toolslikeskimmer netsand brushes cost $20 to $50 upfront. You learn about your ponds needs, such as spotting cloudy water early. You also clean on your own schedule. For a smallgarden pond maintenancesetup, this flexibility is ideal. For instance, a homeowner in Anaheim can skim leaves weekly to keep water clear without professional help.

    Challenges of DIY Cleaning

    Cleaning takes time and effort. A medium-sized pond requires 4 to 6 hours for a full clean.Tasks like scrubbing rocks or draining water are physically demanding. Without experience, you might harm the ecosystem. Overusing chemicals can disruptpH balance adjustmentor kill fish.In Southern California, water restrictions complicate draining. You may need to collect rainwater to comply with local rules.

    Practical DIY Tips

    To clean effectively, follow these steps:

    • Debris skimming: Use a net to remove leaves and twigs daily.
    • Checkfilter cleaning: Rinse filters monthly to prevent clogs.
    • Partial drain: Remove 30 to 50% of water to clean surfaces without stressing fish.
    • Refill with treated water: Add dechlorinator to protect aquatic life.

    Forpond algae removal options, try natural methods like barley straw to reduce growth safely. These steps work for small setups but may overwhelm owners of larger ponds in areas like Riverside County.

    Professional Pond Cleaning: Expertise and Efficiency

    Hiring experts for professional pond services ensures thorough care with minimal effort. Specialists bring tools and knowledge to maintain complex systems.

    Advantages of Professional Cleaning

    Experts diagnose issues like hidden leaks or poorpond water management They useprofessional pond cleaning equipmentlike high-poweredpond vacuumsforsludge removal. A cleaning session takes 1 to 2 hours, compared to a full day for DIY.In Southern California, professionals adjust for heat-driven algae and water restrictions. They also offerpond restoration servicesto revive neglected features.

    For example, a hotel in San Diego had a murky pond restored to clarity in one visit, improving guest impressions. Professional pond cleaning benefits include long-term health and reduced maintenance stress.

    Drawbacks of Professional Cleaning

    Costs range from $200 to $500 per session. Scheduling can be tricky during busy seasons like spring. However, the expertise often outweighs these concerns for complex ponds or busy property managers.

    Professional Methods

    Hiring pond cleanersstarts with water testing for pH and ammonia They remove debris, clean filters, and treat water with safe products. In Los Angeles, experts might add aeration systems to combat heat stress. These methods ensureclear water restorationand protect equipment.

    Explore professional pond care options to simplify maintenance for your Southern California pond.

    Koi-Specific Care: Protecting Your Fish and Plants

    Koi pond cleaning requires extra caution due to fish sensitivity. Stable conditions are vital for fish health management.

    Water Quality for Koi

    Keep pH between 7.0 and 7.5 usingwater testing kits. Test for ammonia and nitrites monthly. Overfeeding adds waste, so feed koi small amounts daily. In Orange, a homeowner learned this after fish became lethargic from excess food.

    Cleaning Tips for Koi Ponds

    Skim debris gently to avoid stirring sediment.If draining, move koi to a temporary aerated tank. Scrub surfaces lightly to preserve bacteria. Foraquatic plant care, trim dead leaves in fall to prevent decay. Choose drought-tolerant plants for Southern California to save water.

    Professional Koi Care

    Experts ensure precise water treatments andUV clarifier maintenanceto control algae.They check for diseases and adjust feeding schedules. This is ideal for affluent homeowners with large koi ponds in Irvine or Santa Ana.

    Eco-Friendly Pond Cleaning Solutions

    Eco-friendly pond cleaning solutions prioritize sustainability. They protect wildlife and align with Californias environmental regulations.

    Natural Cleaning Methods

    Beneficial bacteria treatmentsbreak down organic waste, reducing odors and muck.Enzyme products work safely for fish. Forpond debris removal methods, use rakes with filter pads to collect leaves. Barley straw pellets limit algae naturally.

    Professional Eco-Friendly Practices

    Experts use non-toxic treatments and energy-efficientpump maintenance.In San Bernardino County, professionals might install solar-powered aerators. These methods supportsustainable pond careand comply with water restrictions.

    For example, a municipal park in Riverside used bacteria-based cleaning to restore a pond without chemicals, benefiting local wildlife. These solutions reduce environmental impact while maintaining clarity.

    Cost and Time Comparison

    Pond maintenance cost comparison helps owners budget effectively. Pond cleaning comparison reveals trade-offs.

    DIY Costs and Time

    Tools like nets andpond vacuumscost $50 to $150 once. Supplies forpond cleaning techniquesrun $20 to $50 per session. Annual costs total $100 to $300. Cleaning takes 4 to 8 hours per session.

    Professional Costs and Time

    Sessions cost $200 to $500, with yearly plans at $1,000 to $2,000.Professionals finish in 1 to 2 hours, minimizing disruption. They prevent issues like pump failures, which can cost $500 or more to fix.

    Comparison Table

    AspectDIYProfessional
    Initial Cost$50-150 tools$200-500 per session
    Annual Cost$100-300$1,000-2,000
    Time per Cleaning4-8 hours1-2 hours
    Long-Term SavingsRisk of repairsPreventive care

    This table shows DIYs lower upfront cost versus professional efficiency.

    Risks and Safety Considerations

    Pond health and safety protect owners, fish, and the environment. Mishandling can lead to problems.

    DIY Risks

    Using too many chemicals can cause skin irritation or harm fish. Slippery surfaces risk falls. Toxic algae blooms may pose health hazards if touched.Inbackyard pond upkeep, secure edges to keep kids and pets safe.

    Professional Safety

    Experts use proper gear like gloves and boots. They managemosquito preventionby clearing stagnant areas, critical in humid Orange County.Odor controlprevents complaints from neighbors or HOA members.

    For example, a poorly cleaned pond in Santa Ana led to mosquito issues, resolved by professional intervention. Regular pond inspection reduces these risks.

    Seasonal Pond Cleaning Strategies in Southern California

    Seasonal pond cleaning choices adapt to local weather. Southern Californias mild winters and hot summers shape care routines.

    Spring and Summer

    Remove debris after winter storms. Check filters and test water weekly to combat heat-driven algae. Monitor evaporation and use rainwater when possible.

    Fall and Winter

    Net leaves to prevent decay. Inspect pumps for winter readiness. Mild winters allow lighter maintenance, but stay vigilant for debris.

    A homeowner in San Diego used leaf nets in fall, reducing cleaning time significantly. Professionals can handle deeper seasonal tasks like pond filtration care.

    Advanced Filtration and Equipment Maintenance

    Pond filtration care ensures clear water and healthy ecosystems. Filters trap particles and foster bacteria.

    DIY Equipment Maintenance

    Clean filters monthly to avoid clogs. Checkpump maintenancefor wear annually. ReplaceUV clarifier maintenancebulbs yearly to control algae.

    Professional Equipment Care

    Experts backwash pressurized systems carefully to preserve bacteria. They install energy-efficient pumps, ideal for Southern Californias utility costs. A diagram of a filtration system can clarify components for owners.

    For instance, a property manager in Anaheim upgraded to a solar-powered pump, cutting costs. Professionals ensure equipment longevity.

    Why Choose Koi Pros for Pond Cleaning? We Put Your Needs First

    With over 40 years of experience, Koi Pros delivers tailored pond care across Southern California. Our licensed technicians use advanced filtration technology and eco-friendly methods to keep ponds vibrant. Clients like Jane D. in Irvine praise our ability to restore murky water to clarity in one visit. We serve HOAs, hotels, and homeowners from Orange County to San Diego, offering customized plans that fit your schedule and budget. Our proven expertise ensures fish safety and long-term pond health, making us a trusted partner for your landscaping pond care needs.

    Maintenance Checklist and FAQs

    Maintenance Checklist

    Keep your water feature cleaning on track with this checklist:

    • Weekly: Skim debris, check clarity.
    • Monthly: Test pH, clean filters.
    • Seasonally: Deep clean, add bacteria

    FAQs

    • How often should a koi pond be cleaned?
      Every 3 to 4 months for deep cleaning, with weekly skimming.
    • What are signs of poor pond health?
      Cloudy water, lethargic fish, or foul odors.
    • Can DIY cleaning harm koi?
      Yes, if chemicals are misused or water changes are too sudden.
    • How do experts ensure eco-friendly cleaning?
      They use natural bacteria and non-toxic treatments.

    Client Testimonial

    Koi Pros restored our murky Irvine pond to crystal clear in one visit. Their expertise saved us time and worry. Jane D., Homeowner.

    Summary

    DIY pond cleaning vs professional offers two paths for pond care comparison. DIY saves money but takes time and risks errors. Professionals provide efficiency and expertise, ideal for complex setups. Pond cleaning options include manual skimming or advanced vacuuming. Hiring pond cleaners ensures thorough pond cleaning techniques. Pond water management balances chemistry. Pond algae removal options range from barley straw to professional treatments. Pond debris removal methods use nets or vacuums. Pond restoration services revive neglected features.

    For koi pond cleaning tips, focus on gentle cleaning and water testing. Pond maintenance Southern California demands climate-aware strategies. Professional pond cleaning benefits include time savings and fish safety.

    Contact Koi Pros at (714) 500-7381 to schedule a consultation and keep your pond healthy year-round.


  • How to Clean a Pond Without Draining It

    Pond cleaning doesn?t always require a full drain to maintain a healthy aquatic environment. In fact, draining your pond can be harmful, causing stress to your fish and disrupting the delicate ecosystem. Fortunately, there are effective, sustainable ways to clean your pond without draining it, ensuring the health and vitality of your pond while keeping the water and its inhabitants safe.

    Whether you are dealing with unwanted algae, murky water, or debris accumulation, this guide will walk you through the necessary actions to keep your pond sparkling clean and healthy year-round. By following these methods, you?ll maintain clear water, reduce harmful waste, and improve the overall condition of your pond.

    Here?s what this guide will help you understand:

    • The importance of eco-friendly pond cleaning methods for maintaining fish health and water clarity.
    • The steps you can take to clean your pond without draining it, including tools and techniques.
    • How to maintain the natural balance of your pond ecosystem while cleaning it.
    • Sustainable solutions for preventing algae growth and improving water quality.
    • The role of seasonal maintenance to keep your pond healthy year-round.

    Why Pond Cleaning Without Draining Is Crucial for Your Ecosystem

    Cleaning your pond is essential for preserving the balance of the aquatic ecosystem, maintaining water clarity, and ensuring the health of your fish and plants. Draining a pond may seem like the most effective way to clean it, but it can harm your fish and upset the natural balance within the pond.

    In Southern California, where many homeowners rely on ponds as ornamental water features or for koi farming, draining a pond can cause significant issues. According to recent studies by the Southern California Water Quality Association, poor water management in ponds can lead to nutrient imbalance, increasing the risk of algae blooms and poor water clarity. Draining the pond removes critical water and plant life that play an essential role in maintaining a balanced pond ecosystem.

    When a pond is drained, the removal of water also removes essential nutrients, beneficial bacteria, and aquatic plants that contribute to the pond?s ecosystem. Draining a pond forces fish into a small, stressful space, which can lead to health problems. Instead, cleaning your pond without draining it is a more sustainable and effective solution for long-term pond health.

    Step 1: Removing Floating Debris and Waste

    The first and simplest task in pond cleaning is removing the debris floating on the surface. Organic matter such as leaves, twigs, and dead insects can accumulate quickly and degrade the water quality. While some debris is unavoidable, regular removal can prevent larger issues down the road, like algae blooms or a decrease in oxygen levels.

    Tools You Will Need:

    • Pond Skimmer: This tool is crucial for removing floating debris before it can sink and cause problems. A pond skimmer pulls debris to the surface and deposits it in a collection basket for easy disposal.
    • Manual Pond Net: A pond net is ideal for scooping out larger debris that the skimmer might miss, or for cleaning corners and edges of the pond.

    How It Benefits Your Pond:

    • Prevents the buildup of organic waste, which can lead to algae growth and poor water quality.
    • Helps keep the pond water clear and improves overall aesthetic appeal.
    • Reduces the chance of introducing bacteria or harmful organisms that thrive in decomposing organic matter.

    Step 2: Cleaning the Pond Floor to Eliminate Sludge and Sediment

    Sludge and sediment often settle at the bottom of the pond, where it?s harder to remove. Over time, this layer of waste material can create an unhealthy environment by introducing excess nutrients that feed algae, contributing to poor water quality and fish stress.

    In Southern California, ponds located in areas like Orange County are especially prone to debris buildup due to the region?s dry climate and seasonal rains. The accumulation of organic material from overhanging trees, windblown dust, and plant matter can add to the sludge layer at the bottom of your pond, further complicating the cleaning process. Regular cleaning of the pond floor can help maintain a healthy pond that supports both koi and aquatic plants.

    Essential Tools:

    • Pond Vacuum: The pond vacuum is a powerful tool that allows you to remove sludge from the pond floor without disturbing the water or stressing out the fish. It works similarly to a vacuum cleaner but is designed for aquatic environments.
    • Manual Netting: For larger debris that might settle on the pond floor, use a manual net to scoop it out.

    How It Benefits Your Pond:

    • Prevents the accumulation of harmful waste, which can deplete oxygen levels in the water.
    • Keeps your pond clean, ensuring that the fish and plants are thriving in a healthy environment.
    • Reduces the risk of algae blooms that are typically fueled by organic material decomposing at the bottom of the pond.

    Step 3: Introduce Eco-Friendly Pond Treatments for Healthy Water

    After removing physical debris, it?s essential to improve the biological health of your pond. Pond treatments can help control algae, maintain water balance, and reduce harmful waste. Using eco-friendly pond treatments ensures that you?re not harming your fish or plants while achieving a healthier pond.

    What You Need:

    • Beneficial Bacteria: These bacteria break down harmful organic waste in the water, including ammonia and nitrates. They help maintain water quality and reduce the need for chemical treatments.
    • Algae Control Treatments: Use safe, natural algae control products like barley straw, which works by inhibiting algae growth in a sustainable way.

    Why It Matters:

    • Supports long-term pond health by encouraging the growth of beneficial bacteria that purify the water.
    • Prevents algae blooms and reduces the need for harsh chemical treatments that can harm the aquatic environment.
    • Keeps water clear and helps maintain the overall health of your pond?s ecosystem.

    Step 4: Use UV Clarifiers to Keep Water Clear and Healthy

    A UV clarifier is an excellent tool for keeping your pond water clear and preventing algae growth. The UV light breaks down algae at a cellular level, preventing it from proliferating and turning your pond water green.

    In regions like Los Angeles and Orange County, where algae blooms are particularly common due to warm temperatures, installing a UV clarifier is a wise investment. The presence of direct sunlight and high temperatures creates the perfect environment for algae growth, making it a major concern for local pond owners. By using a UV clarifier, you can keep your pond?s water free from algae and maintain optimal conditions for your koi.

    What You Need:

    • UV Clarifier: This device is typically installed in the pond?s filtration system and uses ultraviolet light to treat the water continuously.
    • Regular Cleaning: Ensure the UV clarifier is cleaned regularly to keep it functioning effectively.

    Why It?s Important:

    • Prevents the growth of algae by targeting and neutralizing it before it can cloud the water.
    • Helps to maintain clear, visually appealing water throughout the year.
    • Supports healthy oxygen levels by ensuring that algae doesn?t decompose and deplete the oxygen supply.

    Step 5: Keep Your Filtration System in Top Shape for Maximum Efficiency

    A proper filtration system is the key to maintaining a healthy pond environment. Filters help remove debris, waste, and excess nutrients from the water, ensuring that your pond stays clean and the ecosystem remains balanced.

    Tools You?ll Need:

    • Mechanical Filtration: Removes large debris like leaves, twigs, and other solids from the water.
    • Biological Filtration: Encourages the growth of beneficial bacteria that break down organic waste and maintain balance in the pond?s ecosystem.
    • Chemical Filtration: Helps eliminate harmful substances that might dissolve in the water.

    Benefits for Your Pond:

    • Keeps the water clean and clear by removing waste products and maintaining water quality.
    • Prevents clogging in the system, which can hinder its performance.
    • Reduces the need for manual cleaning by ensuring the filtration system runs effectively year-round.

    Step 6: Seasonal Care and Maintenance for Long-Term Health

    Seasonal changes in temperature, fish behavior, and plant growth can all affect the health of your pond. Regular, seasonal maintenance ensures that your pond is prepared for each phase of the year, keeping it healthy no matter the season.

    For pond owners in Southern California, where the seasons can vary significantly, seasonal maintenance is key. During the warmer months, ponds can suffer from algae blooms and lower oxygen levels, while in winter, your fish need a different kind of care. By adapting your maintenance schedule to the changing seasons, you ensure that your pond remains a healthy, thriving ecosystem year-round.

    What You Need:

    • Aeration Systems: During the summer months, an aeration system is essential for increasing oxygen levels in the pond.
    • Water Testing Kits: Regularly test the water for pH, ammonia, nitrates, and other parameters to ensure the water is safe and healthy.
    • Winter Prep: During colder months, reduce feeding and keep the pond clean to prevent debris accumulation as your koi rest.

    Why It?s Crucial:

    • Seasonal maintenance ensures that your pond adapts to temperature changes and maintains optimal water quality year-round.
    • Prevents algae growth and oxygen depletion during hot months.
    • Helps keep your pond clean and clear, regardless of the season.

    Frequently Asked Questions (FAQs)

    How often should I clean my pond without draining it?

    Regular maintenance is key to keeping your pond clean and healthy. For most ponds, cleaning should be done at least once a year, but routine tasks like debris removal and water testing should be done every few weeks. In Southern California, where algae blooms can occur frequently due to warm temperatures, you may need to clean more often in the summer months. By following the steps outlined in this guide, you can keep your pond in top condition without draining it.

    Is it safe to clean a koi pond without draining it?

    Yes, cleaning a koi pond without draining it is not only safe but also beneficial for the health of your koi and the overall pond ecosystem. Draining a pond can cause stress to the fish and disrupt the ecosystem. By using methods like pond vacuums, skimmers, and eco-friendly treatments, you can remove debris and improve water quality while maintaining the balance needed for a thriving koi pond.

    How do I ensure that the cleaning methods are safe for my fish?

    To ensure that your cleaning methods are safe for your fish:

    • Use non-toxic pond treatments like beneficial bacteria and natural algae control solutions.
    • Avoid disturbing the pond floor too aggressively, which could stress the koi.
    • Regularly test water quality to ensure pH, ammonia, and nitrite levels are within safe ranges for your fish.
    • Always clean the pond gently, especially when using equipment like pond vacuums, to avoid disturbing your koi unnecessarily.

    Can I clean a pond without a UV clarifier?

    While a UV clarifier helps to maintain clear water by neutralizing floating algae, it is not strictly necessary for cleaning a pond. However, without a UV clarifier, you may experience more frequent algae blooms, especially in warmer months, common in Southern California. If you?re serious about keeping your pond water clear and free from algae, installing a UV clarifier is an excellent investment. It helps prevent green water and ensures your pond remains visually appealing.

    How do I control algae growth in my pond without draining it?

    Controlling algae growth without draining the pond involves several strategies:

    • Remove organic debris regularly, as it provides nutrients for algae growth.
    • Use eco-friendly algae control products like barley straw, which naturally inhibits algae growth.
    • Introduce algae-eating fish like grass carp, which help keep algae under control by eating it.
    • Improve pond aeration: Aeration systems like fountains or waterfalls increase oxygen levels, which help prevent algae blooms.
    • Regularly test and maintain water quality to ensure a balanced pond environment.

    How do I know if my pond filtration system needs maintenance?

    Your pond filtration system is crucial for maintaining clear and healthy water. Here are some signs that it may need maintenance:

    • Water flow is reduced: If the water is not circulating properly, the filter may be clogged or damaged.
    • Visible debris: If debris is visible in the water or accumulating on the pond floor, the filter may not be working effectively.
    • Water quality issues: If you notice cloudy water, algae blooms, or an unpleasant smell, it?s time to check the filtration system.
      To maintain proper filtration, clean the filter regularly, check for damage, and ensure that the filter is appropriately sized for the volume of water in your pond.

    Should I feed my fish before cleaning the pond?

    It?s best to avoid feeding your fish for a few hours before cleaning the pond. This gives the fish a chance to clear their digestive systems and prevents uneaten food from contaminating the water during the cleaning process. Once the pond is clean and the water is restored to a healthy condition, you can resume feeding your koi.

    Is pond cleaning different for koi ponds compared to other types of ponds?

    Yes, koi ponds require special care during cleaning due to the presence of fish. Koi are sensitive to changes in water quality, so it?s crucial to use gentle cleaning methods that minimize stress. Some additional considerations for koi ponds include:

    • Avoid using harsh chemicals that could harm the fish.
    • Maintain proper oxygen levels to prevent stressing the koi.
    • Be mindful of fish health during cleaning, especially when using pond vacuums and other tools that may disturb the water.

    How do I clean a pond in the winter?

    Winter cleaning requires a gentler approach since your fish are likely in a more dormant state. In Southern California, winters are typically mild, so most ponds don’t need drastic action. However, you should:

    • Remove surface debris regularly to prevent buildup.
    • Test the water quality and adjust as needed.
    • Avoid disturbing the pond too much, especially if your koi are hibernating.
    • If there is significant debris on the pond floor, use a pond vacuum carefully to avoid stressing the fish.

    Can I clean a pond myself, or should I hire a professional?

    You can certainly clean your pond yourself, especially if it?s a manageable size. However, if your pond is large or heavily contaminated, or if you?re dealing with koi ponds where fish health is a primary concern, hiring a professional can help. Professionals like Koi Pros bring over 40 years of expertise in pond cleaning, offering eco-friendly solutions, effective treatments, and customized care for your specific pond needs.

    Your Pond, Perfected with Koi Pros ? Discover Why We?re Your Best Choice

    • Proven expertise: Over 40 years of experience in koi pond care and pond maintenance.
    • Personalized care: Tailored pond maintenance plans that suit your needs and protect your pond’s ecosystem.
    • Eco-friendly solutions: We prioritize sustainable methods to ensure a healthy pond for both fish and the environment.
    • Trusted by homeowners, property managers, and commercial clients throughout Southern California.

    Conclusion: Keep Your Pond Healthy with Expert Care

    Cleaning your pond without draining it is a sustainable and effective way to maintain the health of your pond?s ecosystem. By following the steps outlined in this guide, you can keep your pond clear, healthy, and vibrant without the stress and disruption of draining. Regular maintenance, eco-friendly solutions, and expert care ensure that your pond will thrive year-round, benefiting both your aquatic life and the environment.

    Book a Consultation with Koi Pros to ensure your pond stays clean, healthy, and beautiful for years to come!